
The Ultimate Xbox 360 RGH 1.2 Guide: Unlock Your Jasper & Falcon
Preserving a digital Video Game library requires complete hardware access. The retro modding scene contains fragmented forums and conflicting terminology. Rule Mobile engineered this definitive blueprint to cut through the confusion. This guide provides the exact steps to apply an RGH 1.2 modification to an Xbox 360 and structure its operating system for maximum utility.
Required Hardware and Software
Gather the following components before opening the console:
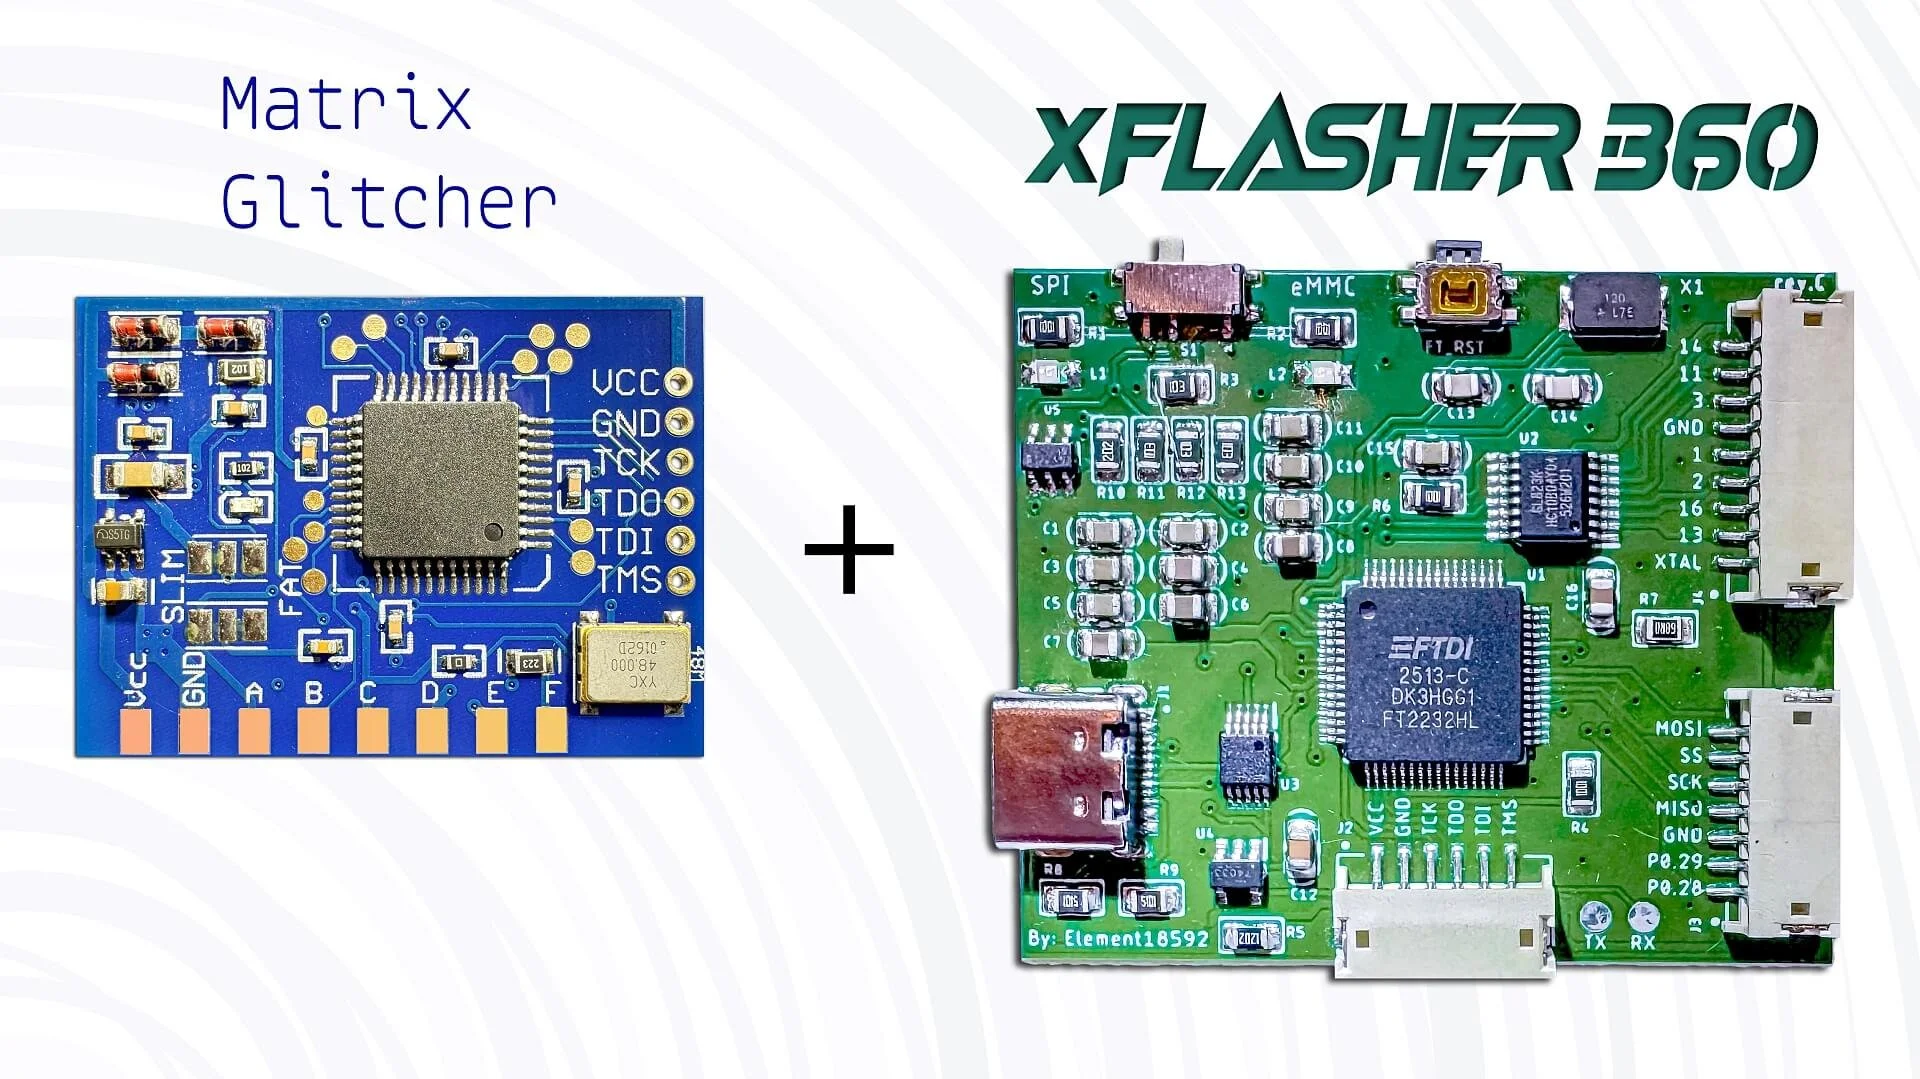
Mod Chips: Matrix Chip (Matrix V1-style Glitch Chip· XC2C64A) and an xFlasher 360 SPI programmer.
Wiring: 30 AWG Kynar wire for signals. Thicker gauge wire for power and ground.
Tools: Windows PC, Torx screwdrivers, soldering iron, flux
Software: J-Runner with Extras. (J-Runner with Extras link)
Storage: A fresh SSD formatted to FATX. (You can use an original “old” xbox 360 HDD but it is alot slower than an “SSD” and due to age will not be reliable/future-proof)

Step 1: Identify the Motherboard
This documentation applies exclusively to Jasper and Tonasket (Jasper V2) motherboards. Microsoft manufactured these late-model consoles with 65nm CPUs and GPUs, significantly reducing thermal output and hardware failure rates.
Open the console chassis. Inspect the green circuit board in the bottom right corner, directly below the Microsoft logo.
Jasper (V1): Locate silkscreen code X815842-002.
Tonasket (Jasper V2): Locate silkscreen code X820379-001.
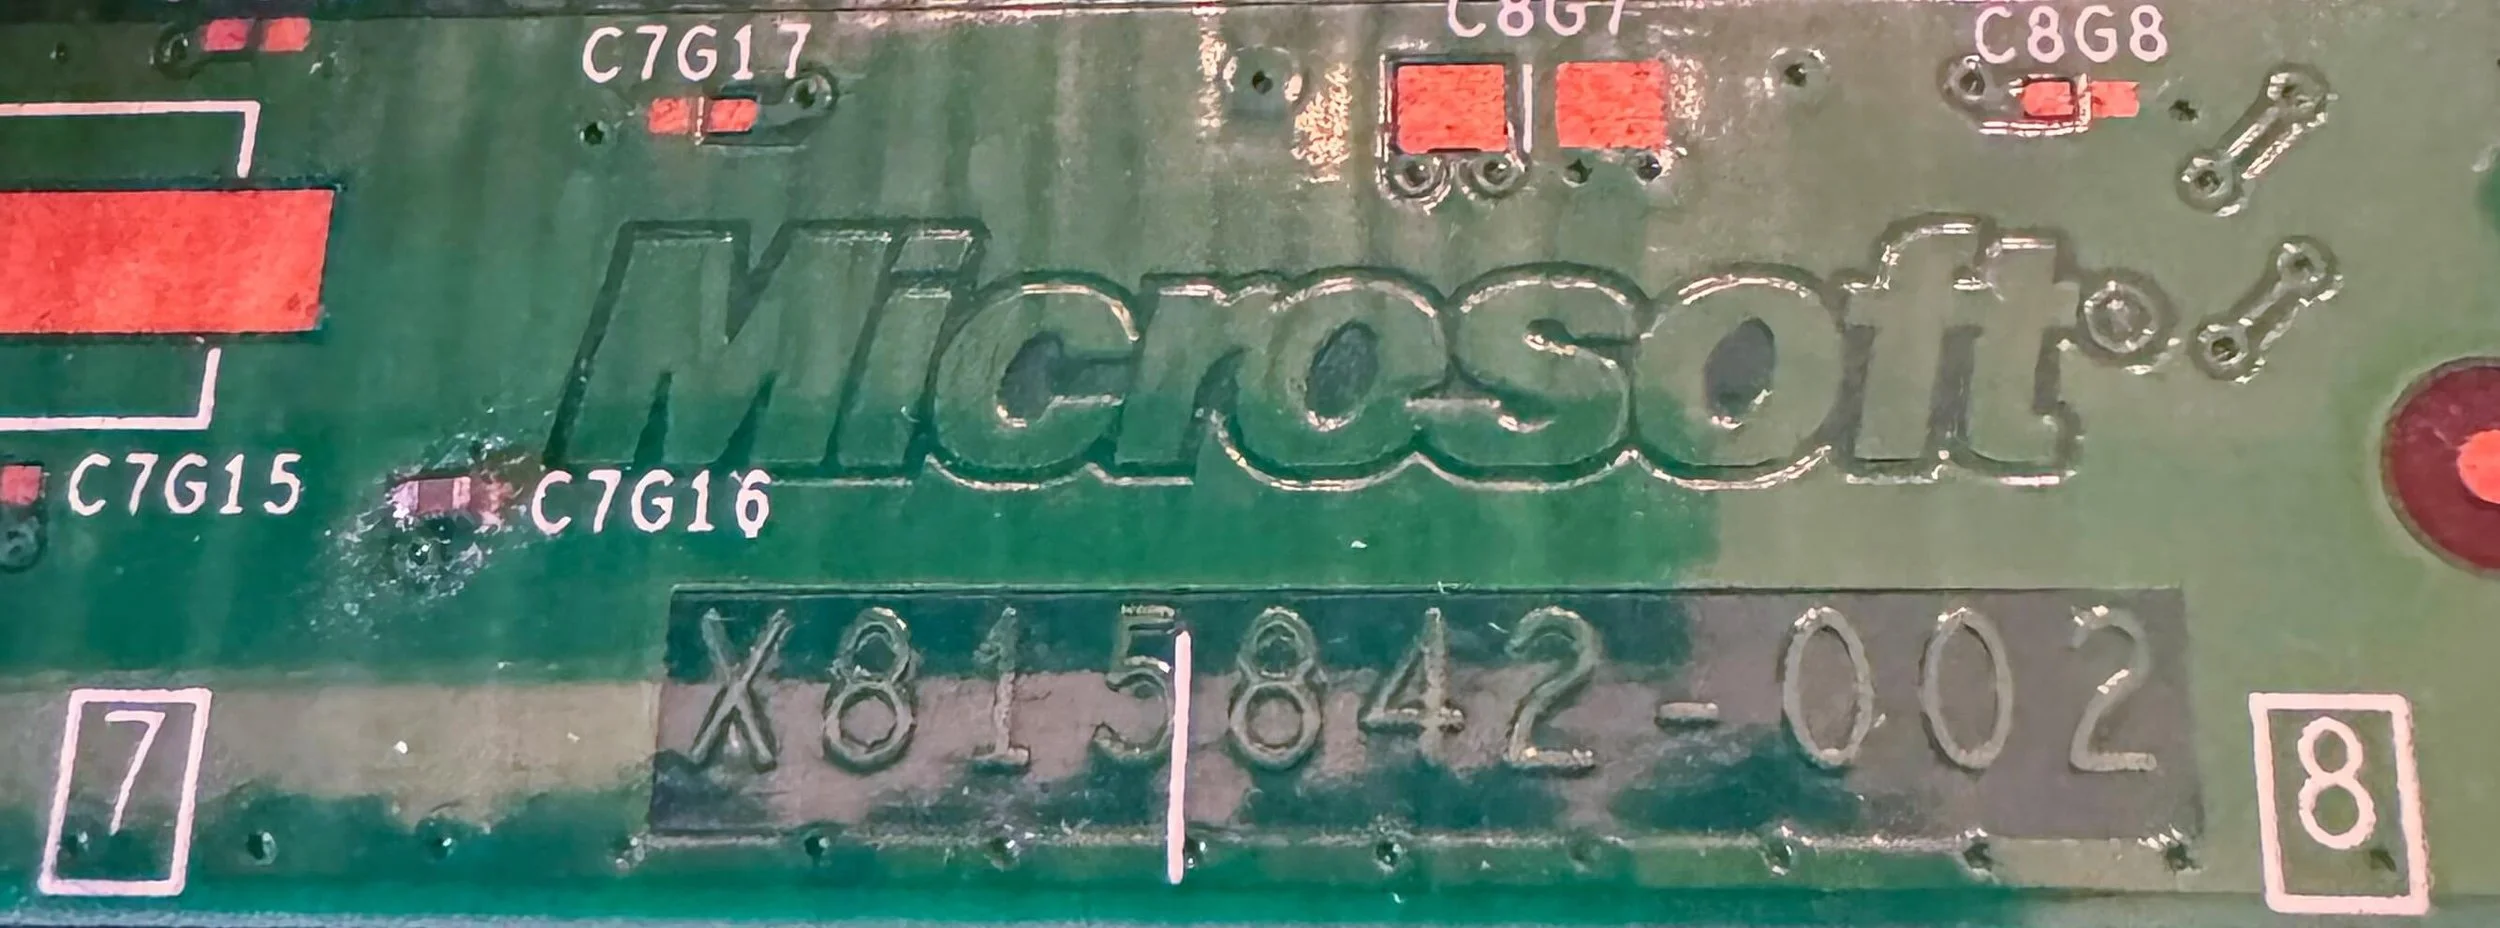
(X815842-002): This is a Jasper motherboard (often referred to as a Jasper V1). Introduced around late 2008, this revision is highly sought after as it introduced a 65nm CPU and 65nm GPU, greatly reducing heat output and essentially curing the infamous Red Ring of Death (RROD) issues found in older models.
Motherboard Revision: Jasper (V1)
PCB Silkscreen Part Number: X815842

(X820379-001): This is a Tonasket motherboard (widely known in the Xbox 360 community as a Jasper V2 or Kronos board). Introduced in late 2009, this was the absolute final and most reliable motherboard revision for the original "Fat" Xbox 360 consoles, utilizing a highly resilient and optimized "Kronos" GPU.
Motherboard Revision: Tonasket (Jasper V2)
PCB Silkscreen Part Number: X820379
Step 2: Read and Secure the NAND
The NAND chip stores the console operating system and encryption keys. You must create an identical backup before writing new data.
Unplug the Xbox power supply and USB connections.
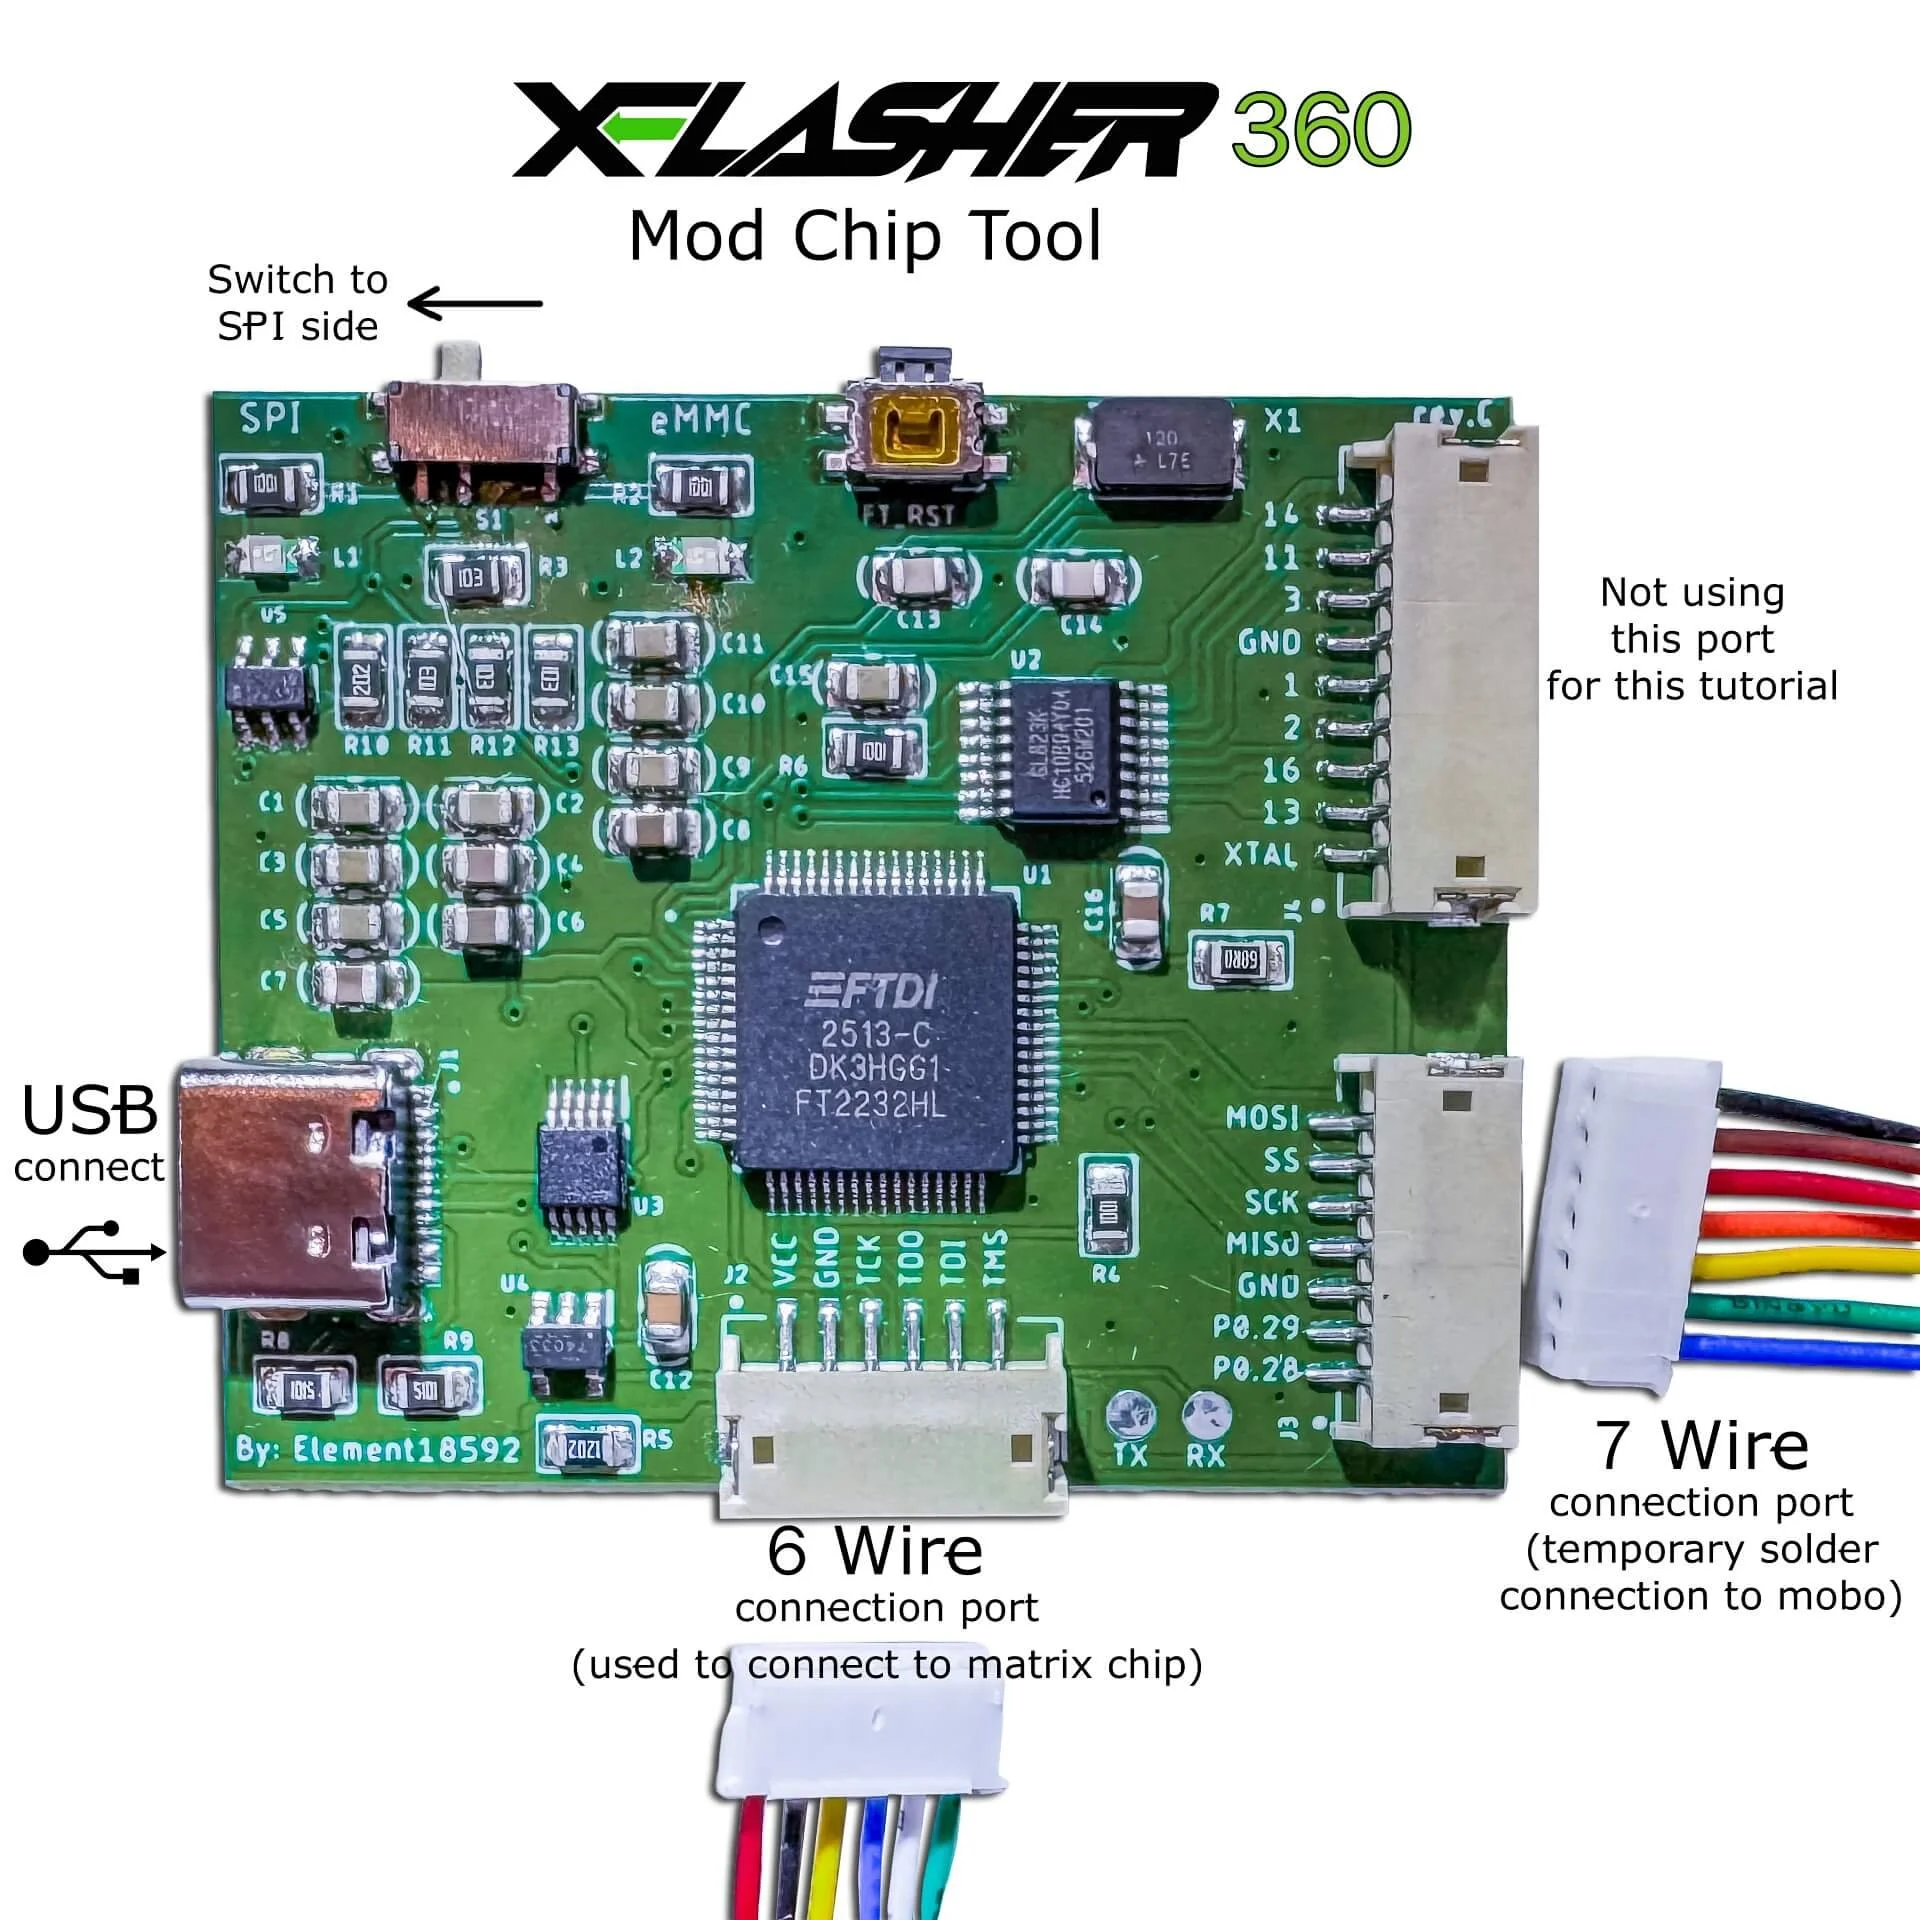
Switch the xFlasher to SPI mode.
Solder the 7-wire SPI harness to the motherboard. Wire mapping: Black to 1, Brown to 2, Red to 3, Orange to 4, Yellow to 5, Green to 6, Blue to 7.
This is the temporary seven-wire 16/256/512MB SPI cable, not the six-wire Matrix programming cable. Five leads route to J1D2 and green/blue route toward J2B1 as expected. (Blue chip also known as “Matrix Chip” can be ignored on this image for this part)
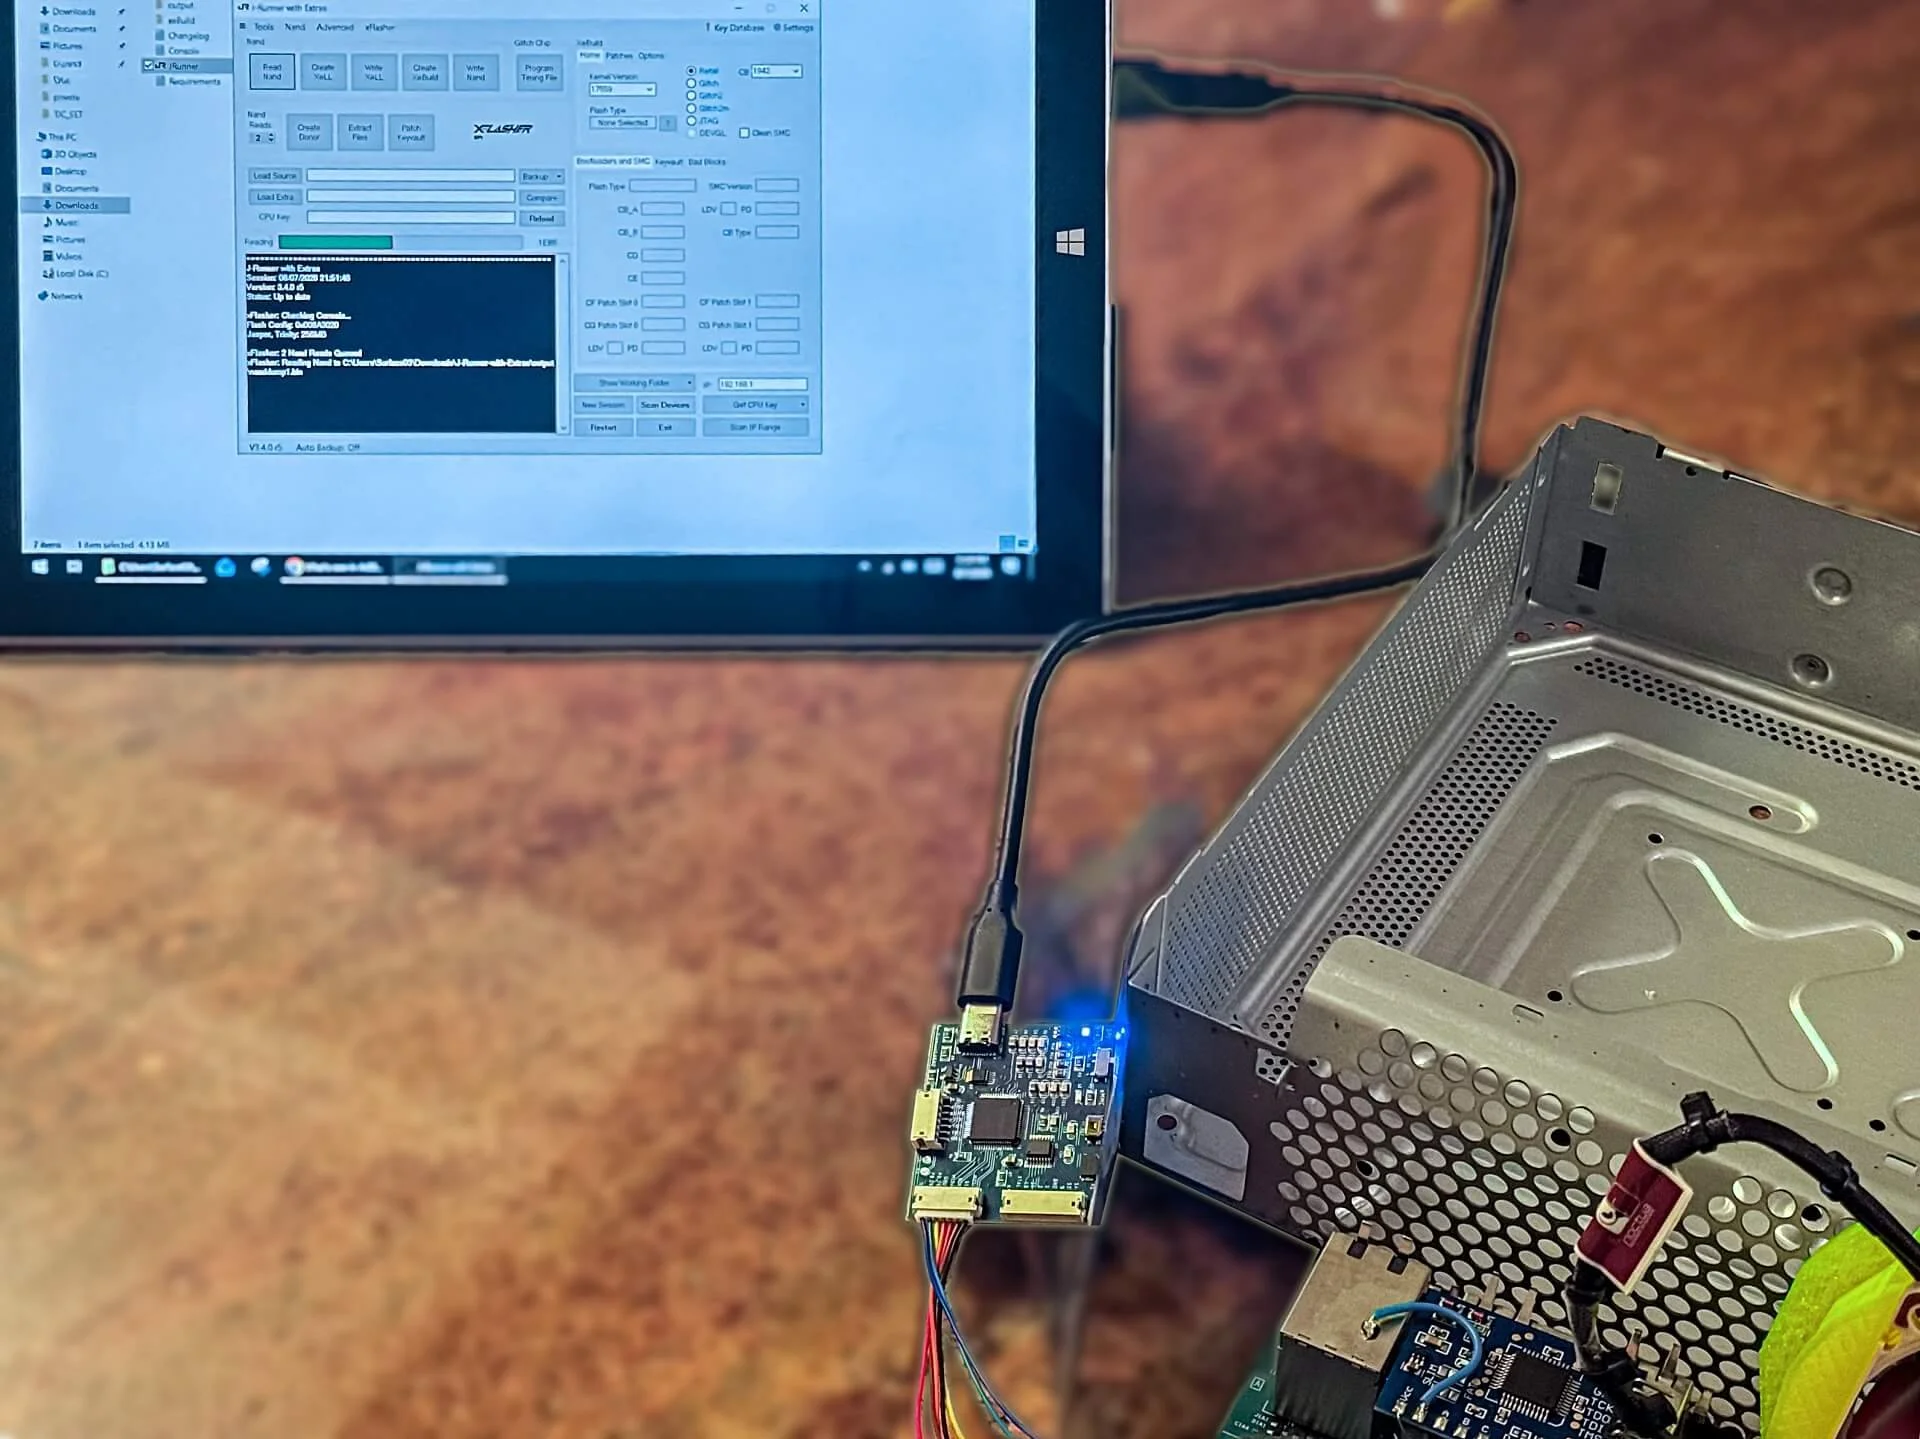
7 Wire Connection from Xbox 360 Jasper FAT mobo (motherboard) to X-Flasher chip to PC running JRunner.
Plug in the Xbox power supply. Do not power the console on. The power brick indicator must display amber. The internal fans must remain stationary.
Connect the xFlasher to the PC via USB. Launch J-Runner.
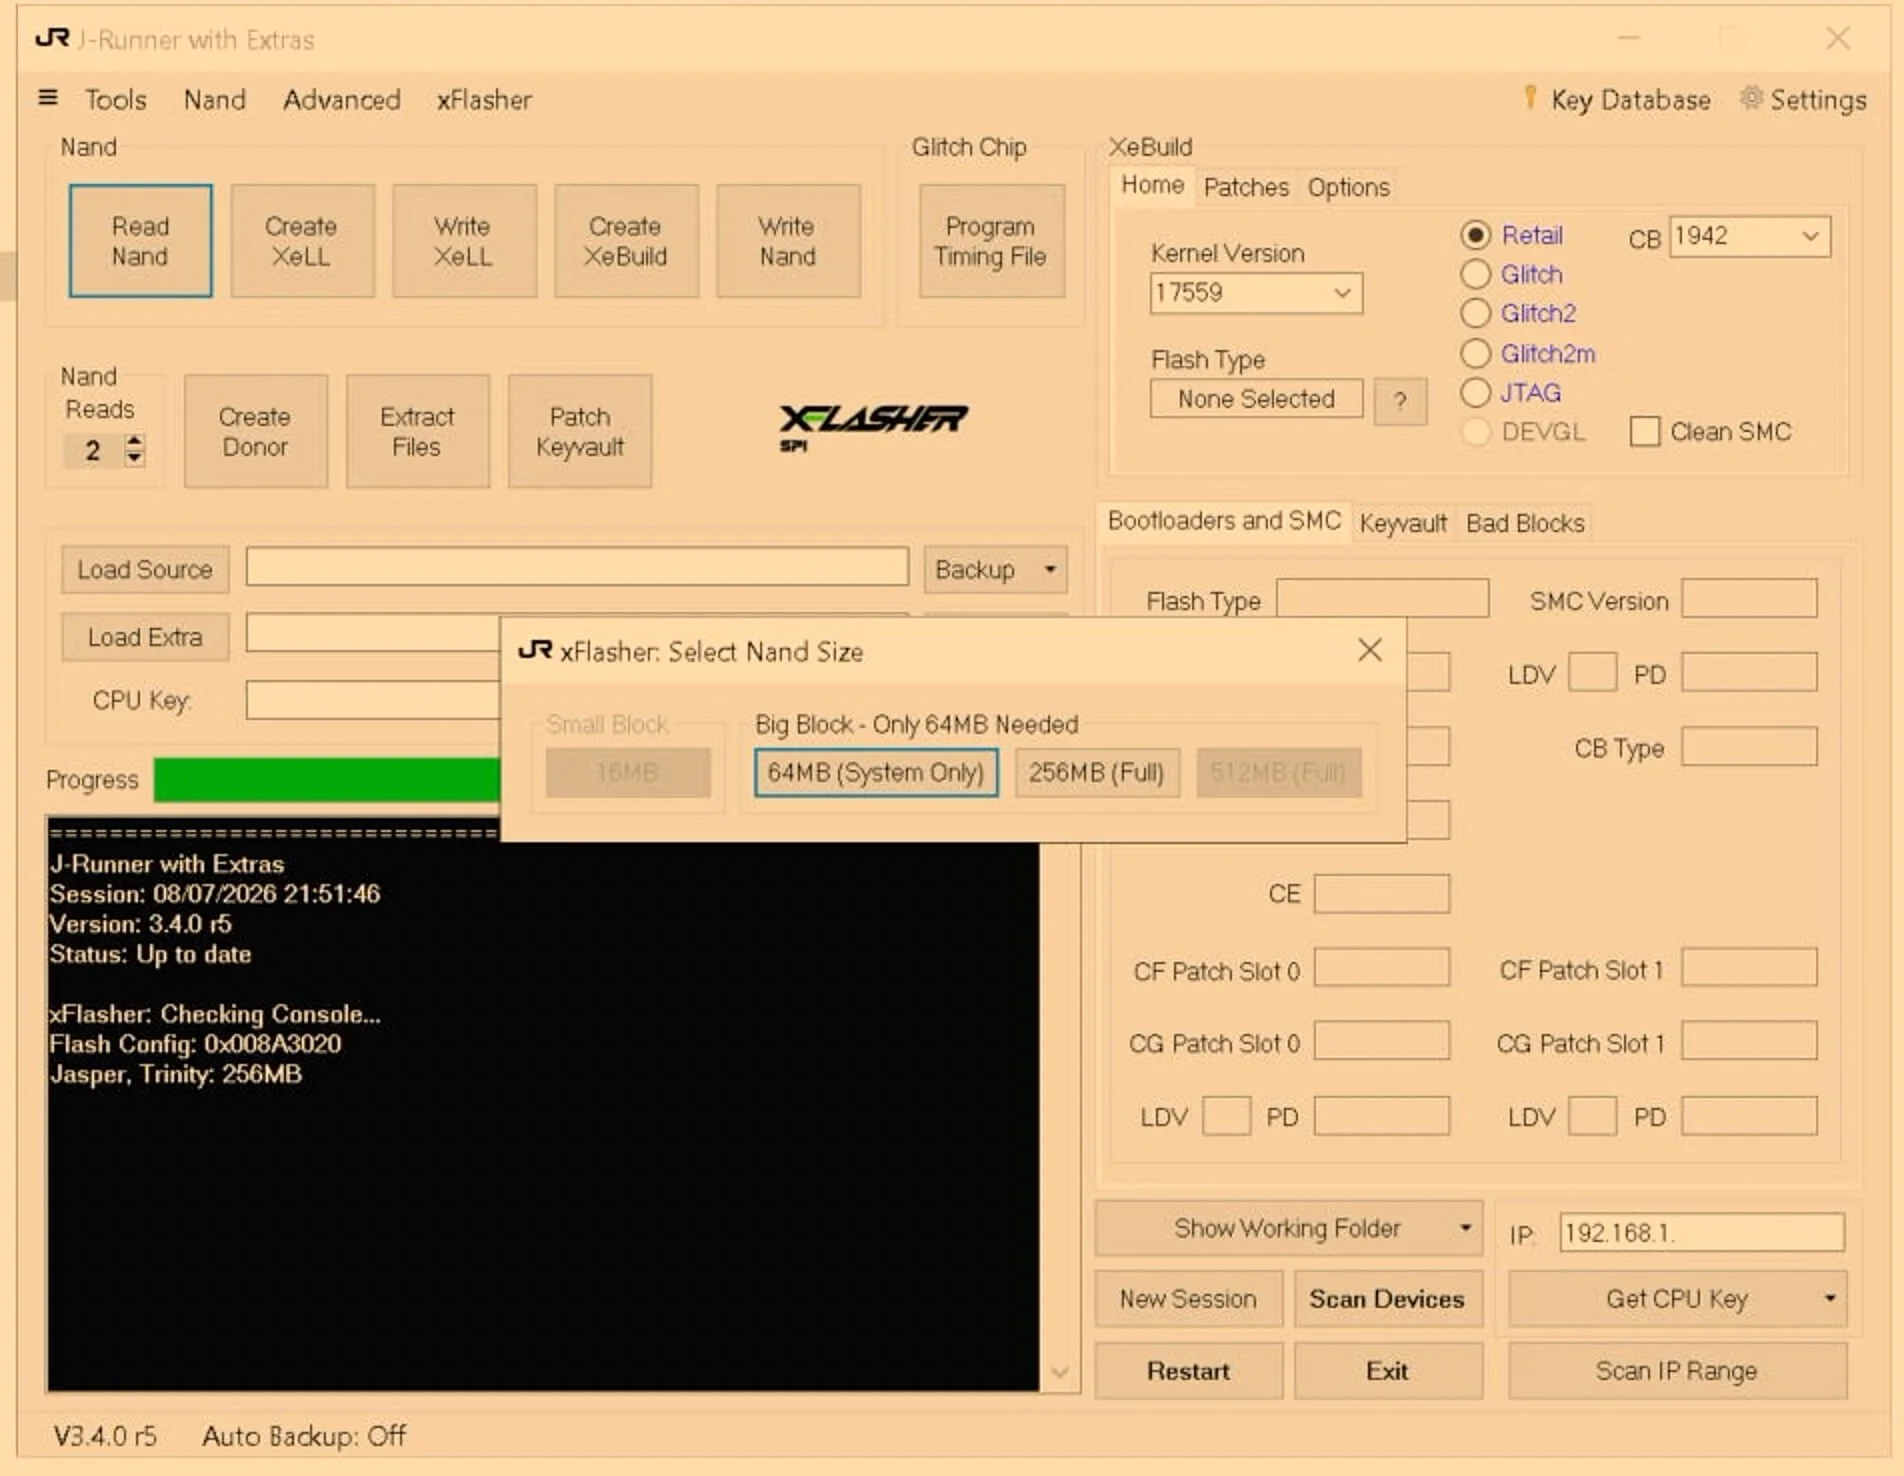
Click Read Nand. Select 256MB (Full) when prompted for size.
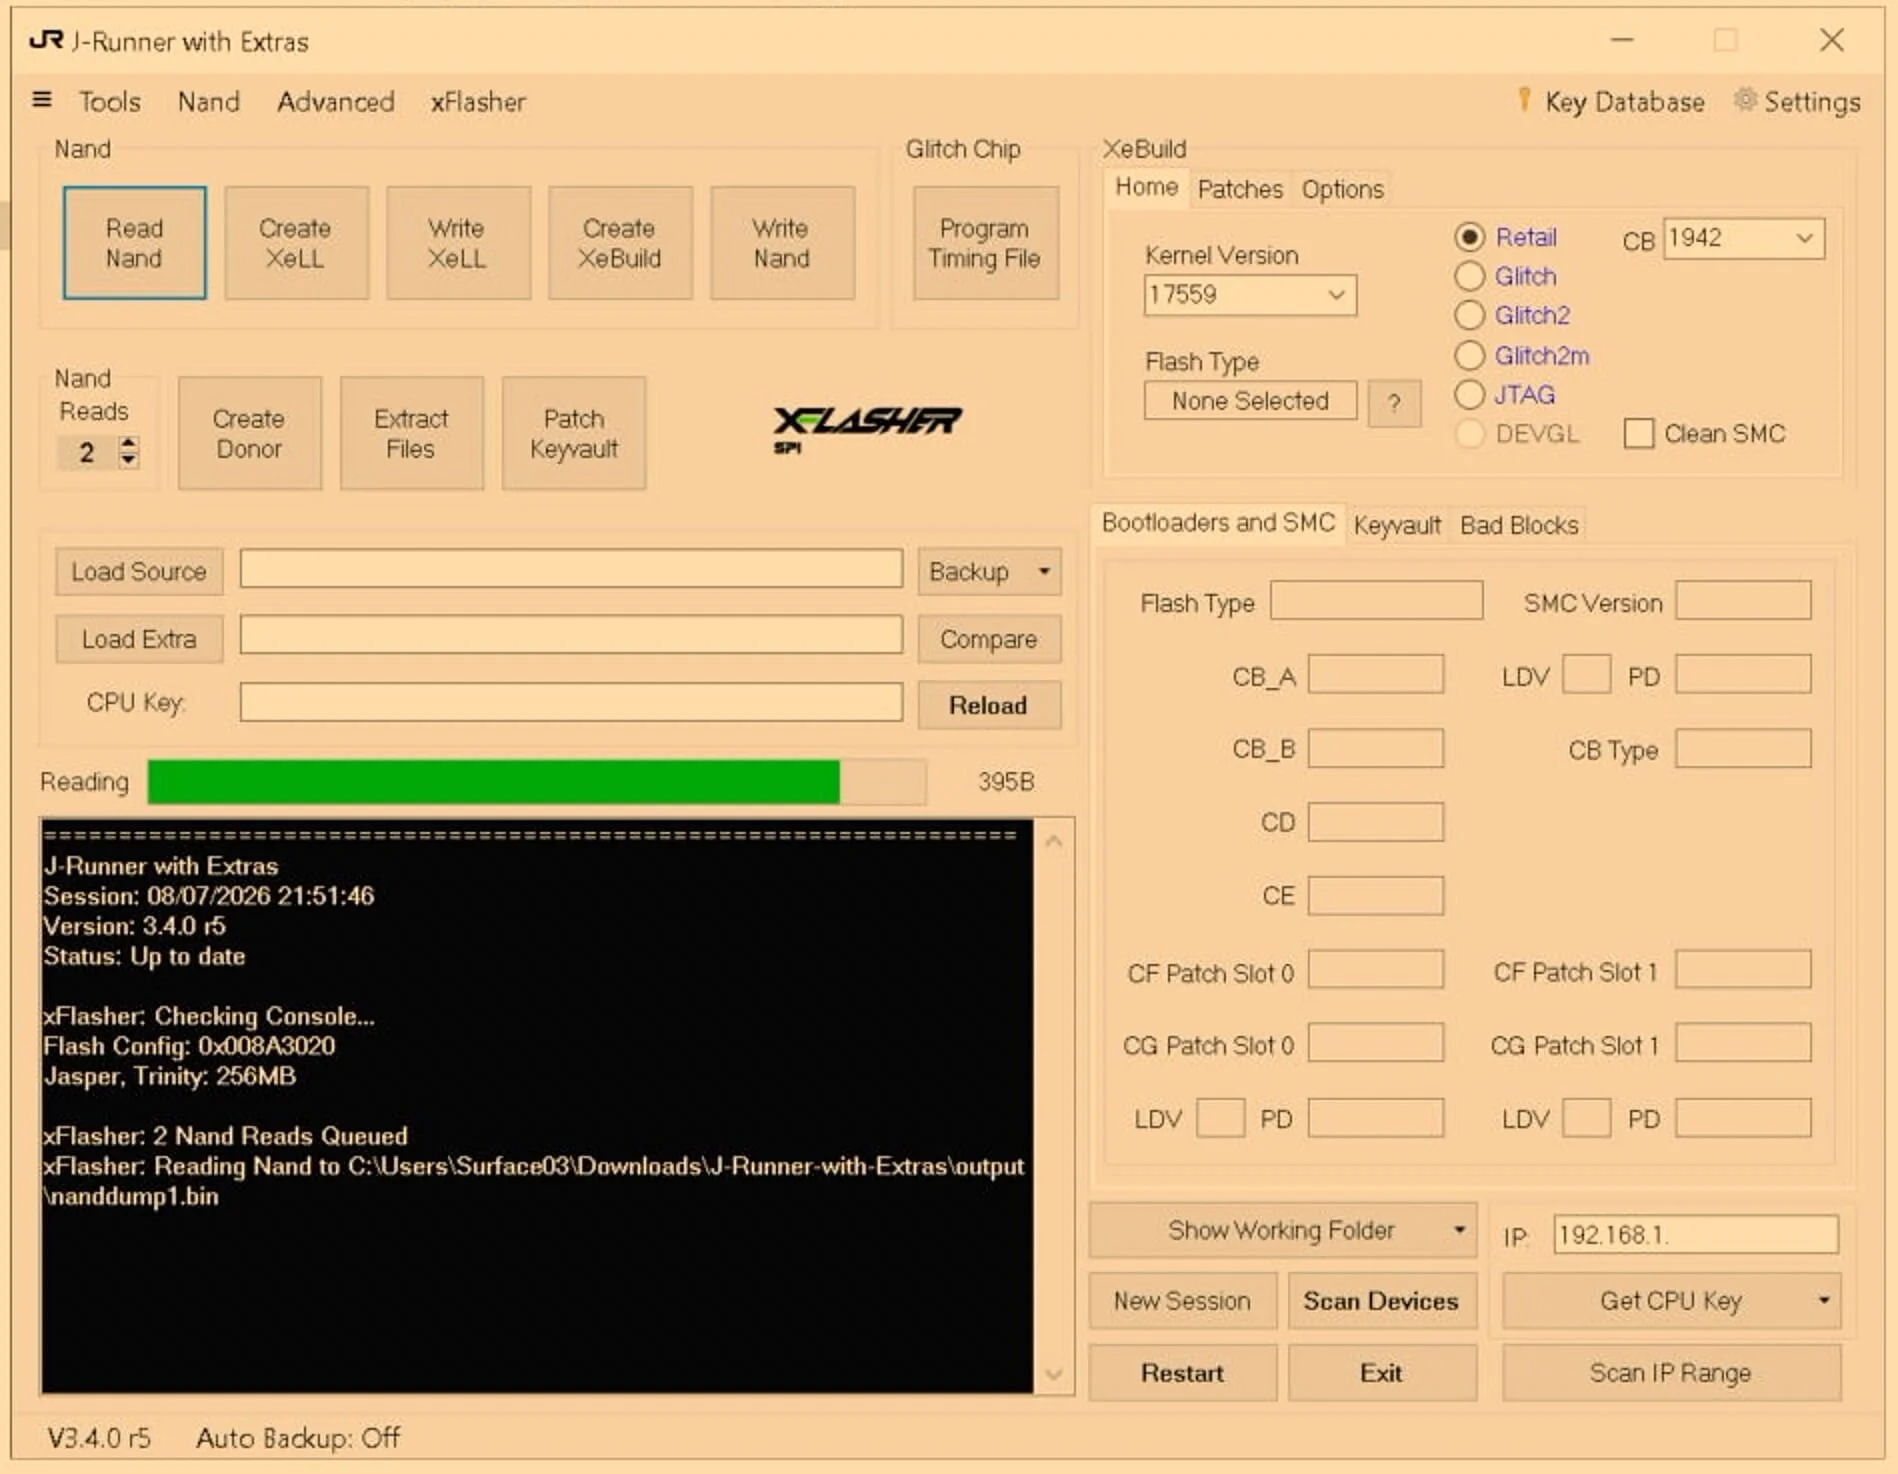
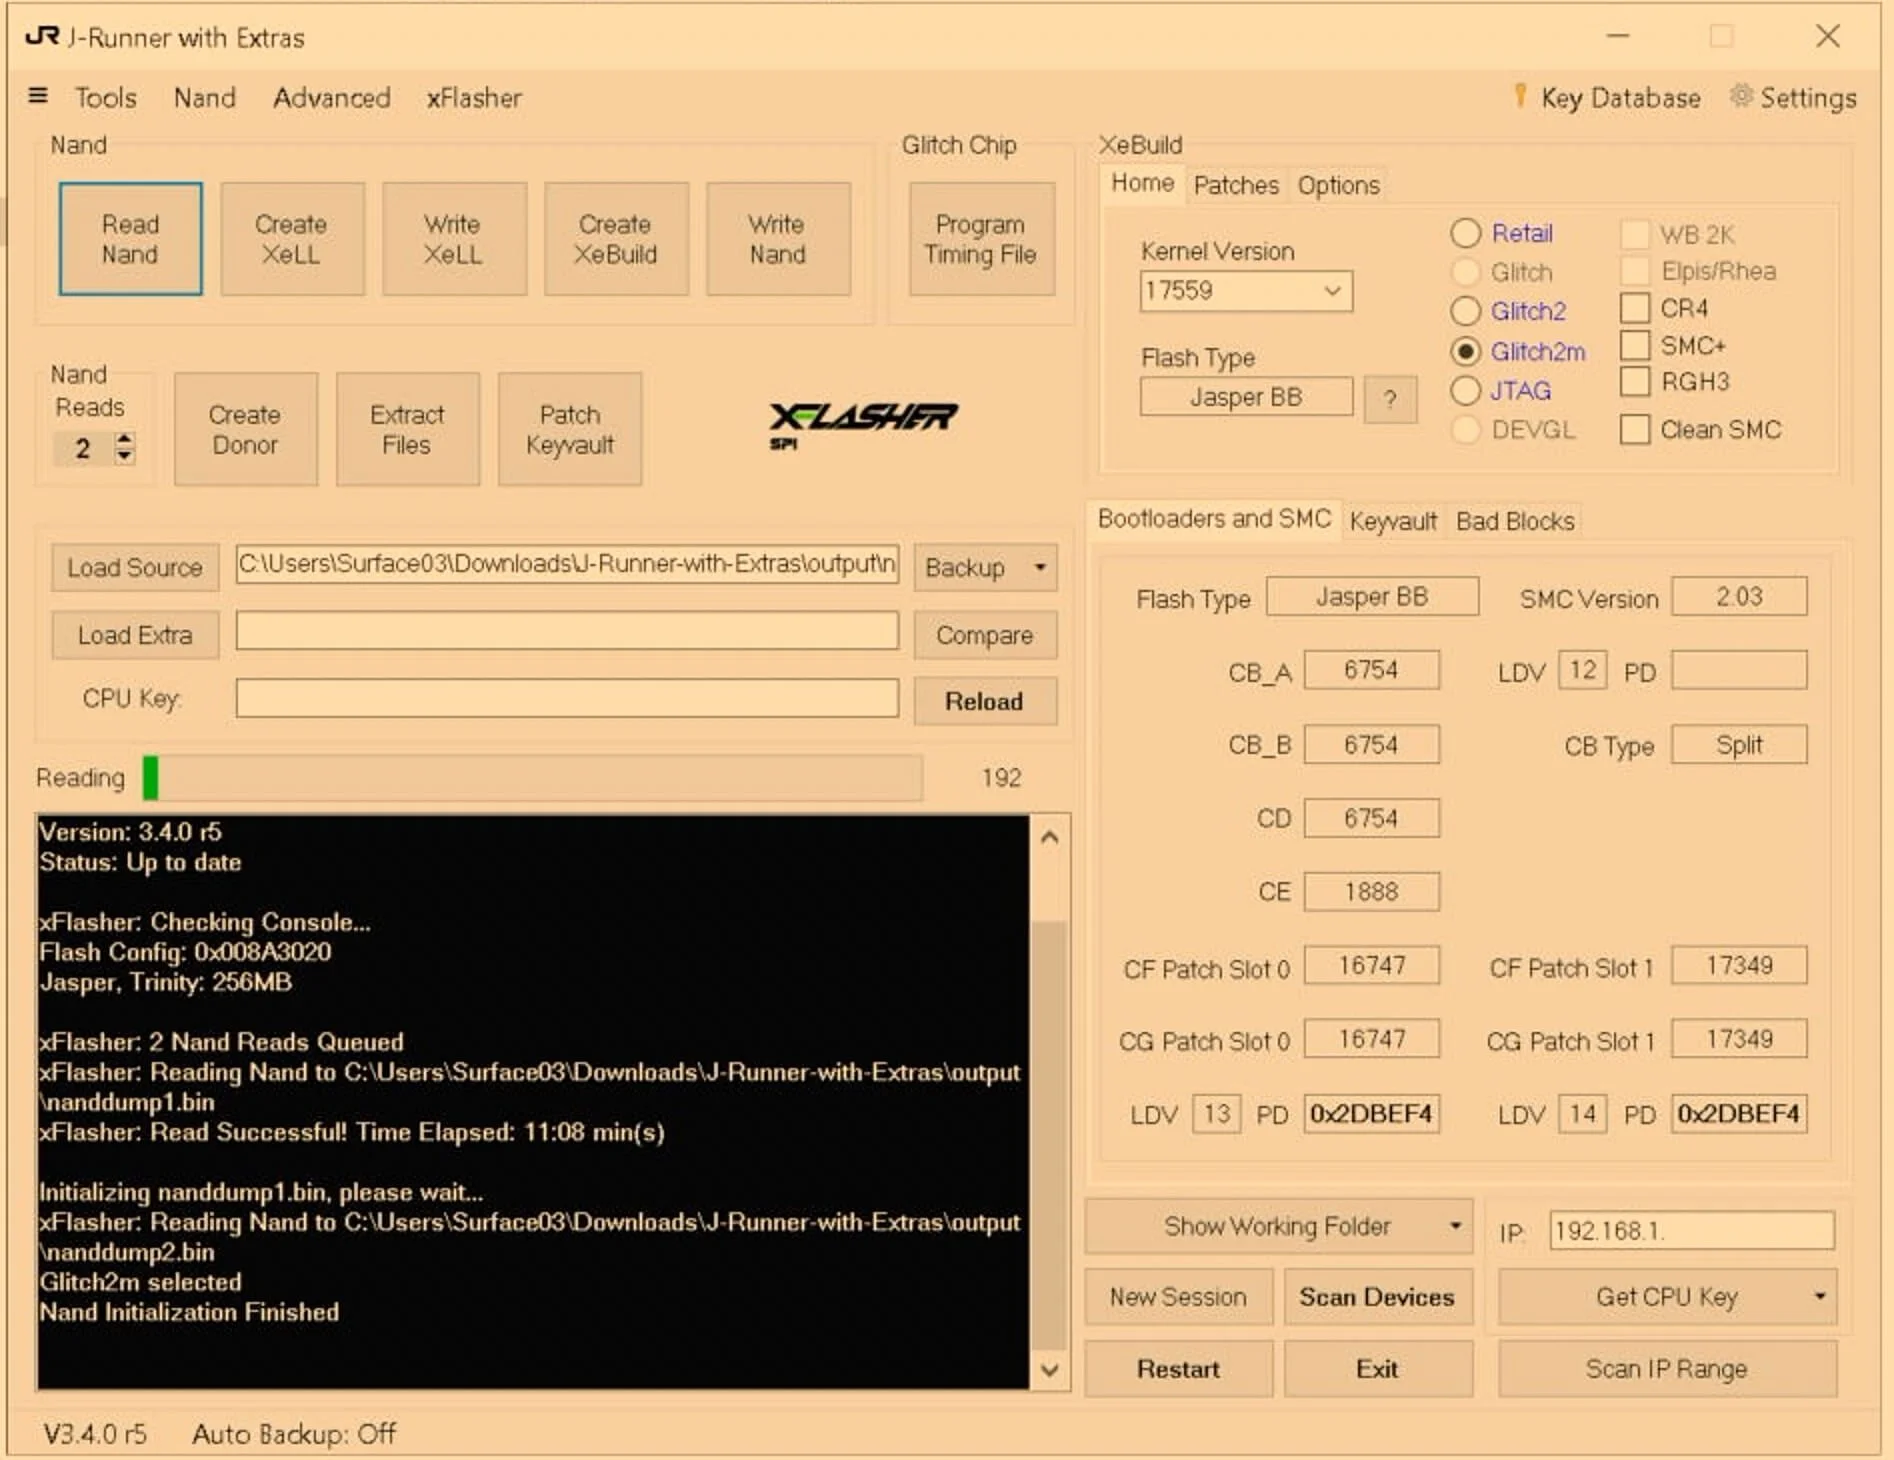
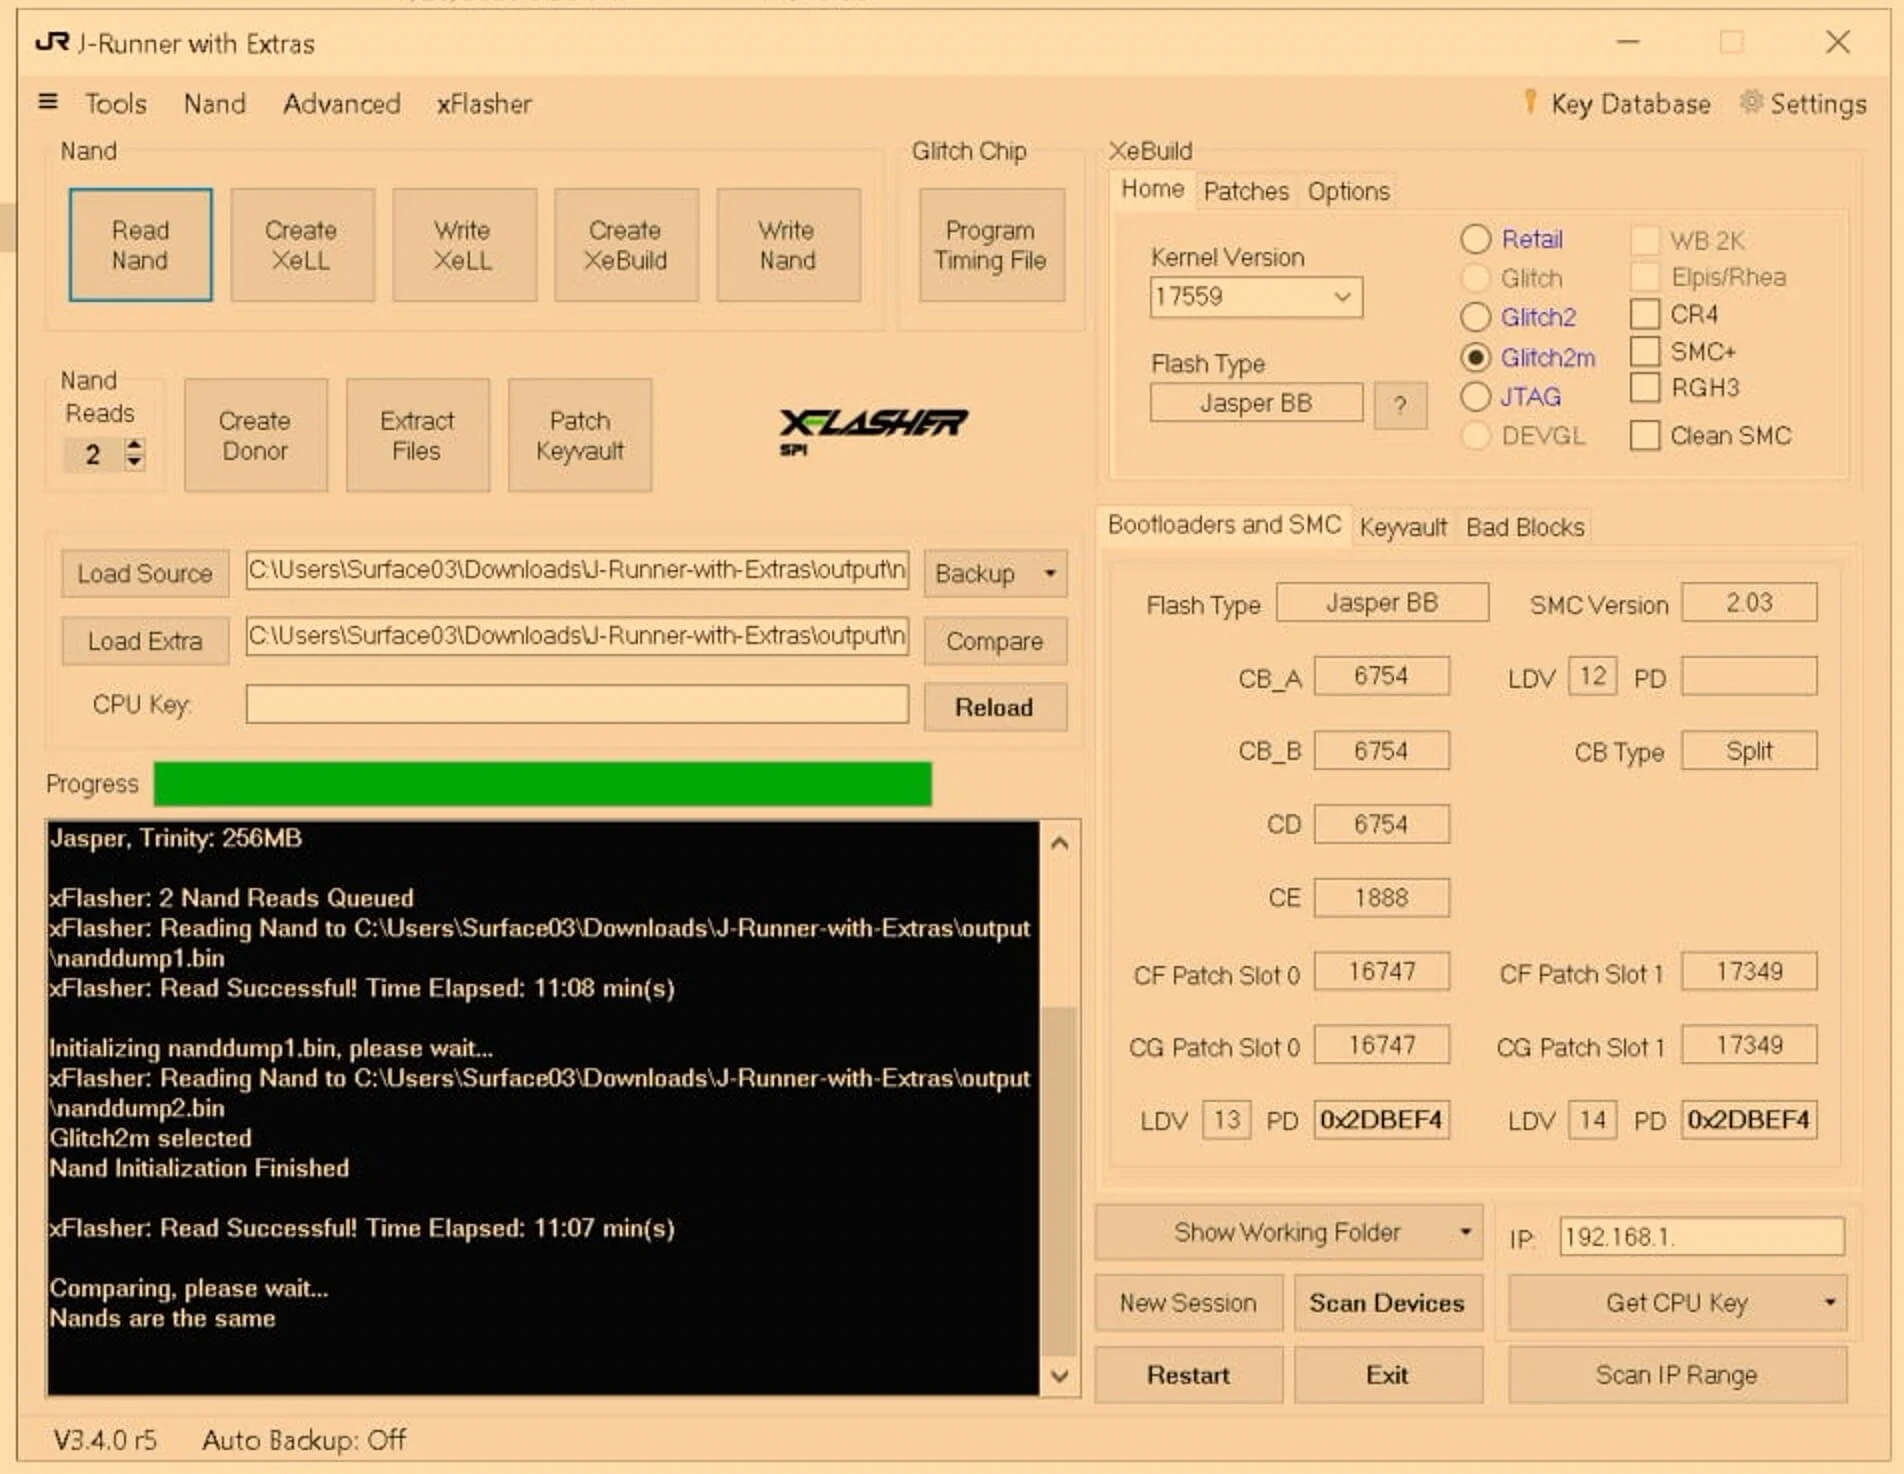
J-Runner will read the chip twice. Require the exact confirmation log: "Nands are the same".
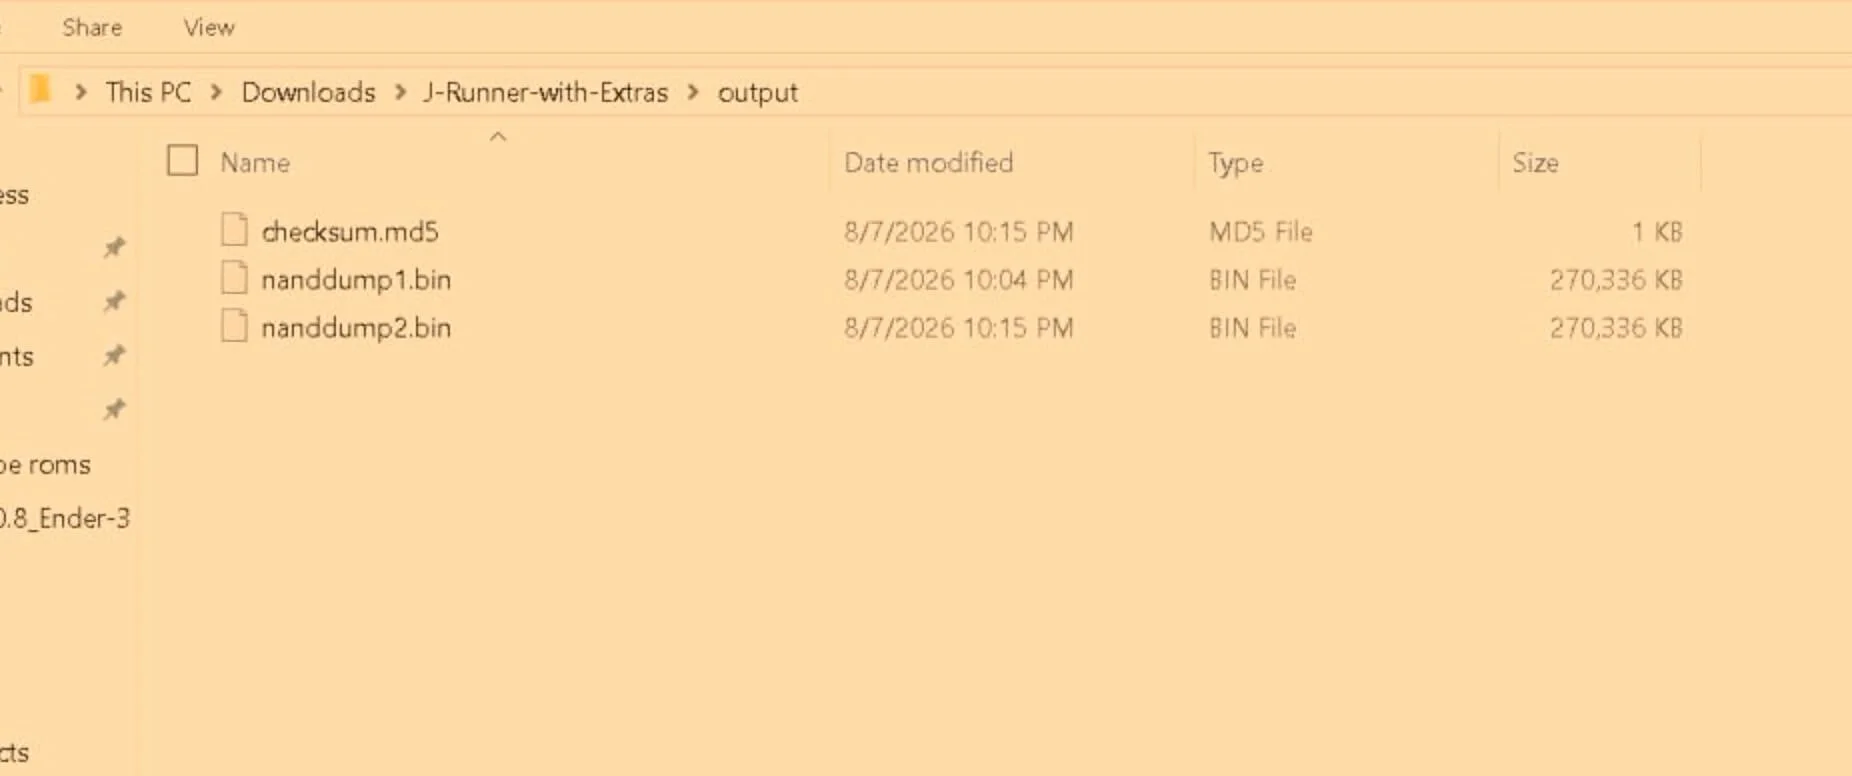
Duplicate these output files (nanddump1.bin and nanddump2.bin) to multiple offline storage locations.

Execute the Initial NAND Read
With the USB and Xbox power initially disconnected, verify the hardware state:
The xFlasher is set to SPI mode.
The 7-wire SPI harness is securely soldered and connected to the programmer.
The 6-wire Matrix programming cable is disconnected.
The xFlasher rests on a non-conductive surface.
Heatsinks and cooling fans remain installed.
Connect the Xbox power supply. The power brick indicator must display amber. The internal fans must remain stationary.
Connect the SPI harness to the xFlasher, then connect the xFlasher to the Windows PC via USB-C.
Launch JRunner.exe.
Verify J-Runner detects the programmer. If undetected, click Tools → Scan Devices. Do not proceed until the programmer is recognized.
Configure J-Runner Parameters
Leave the default visible variables untouched:
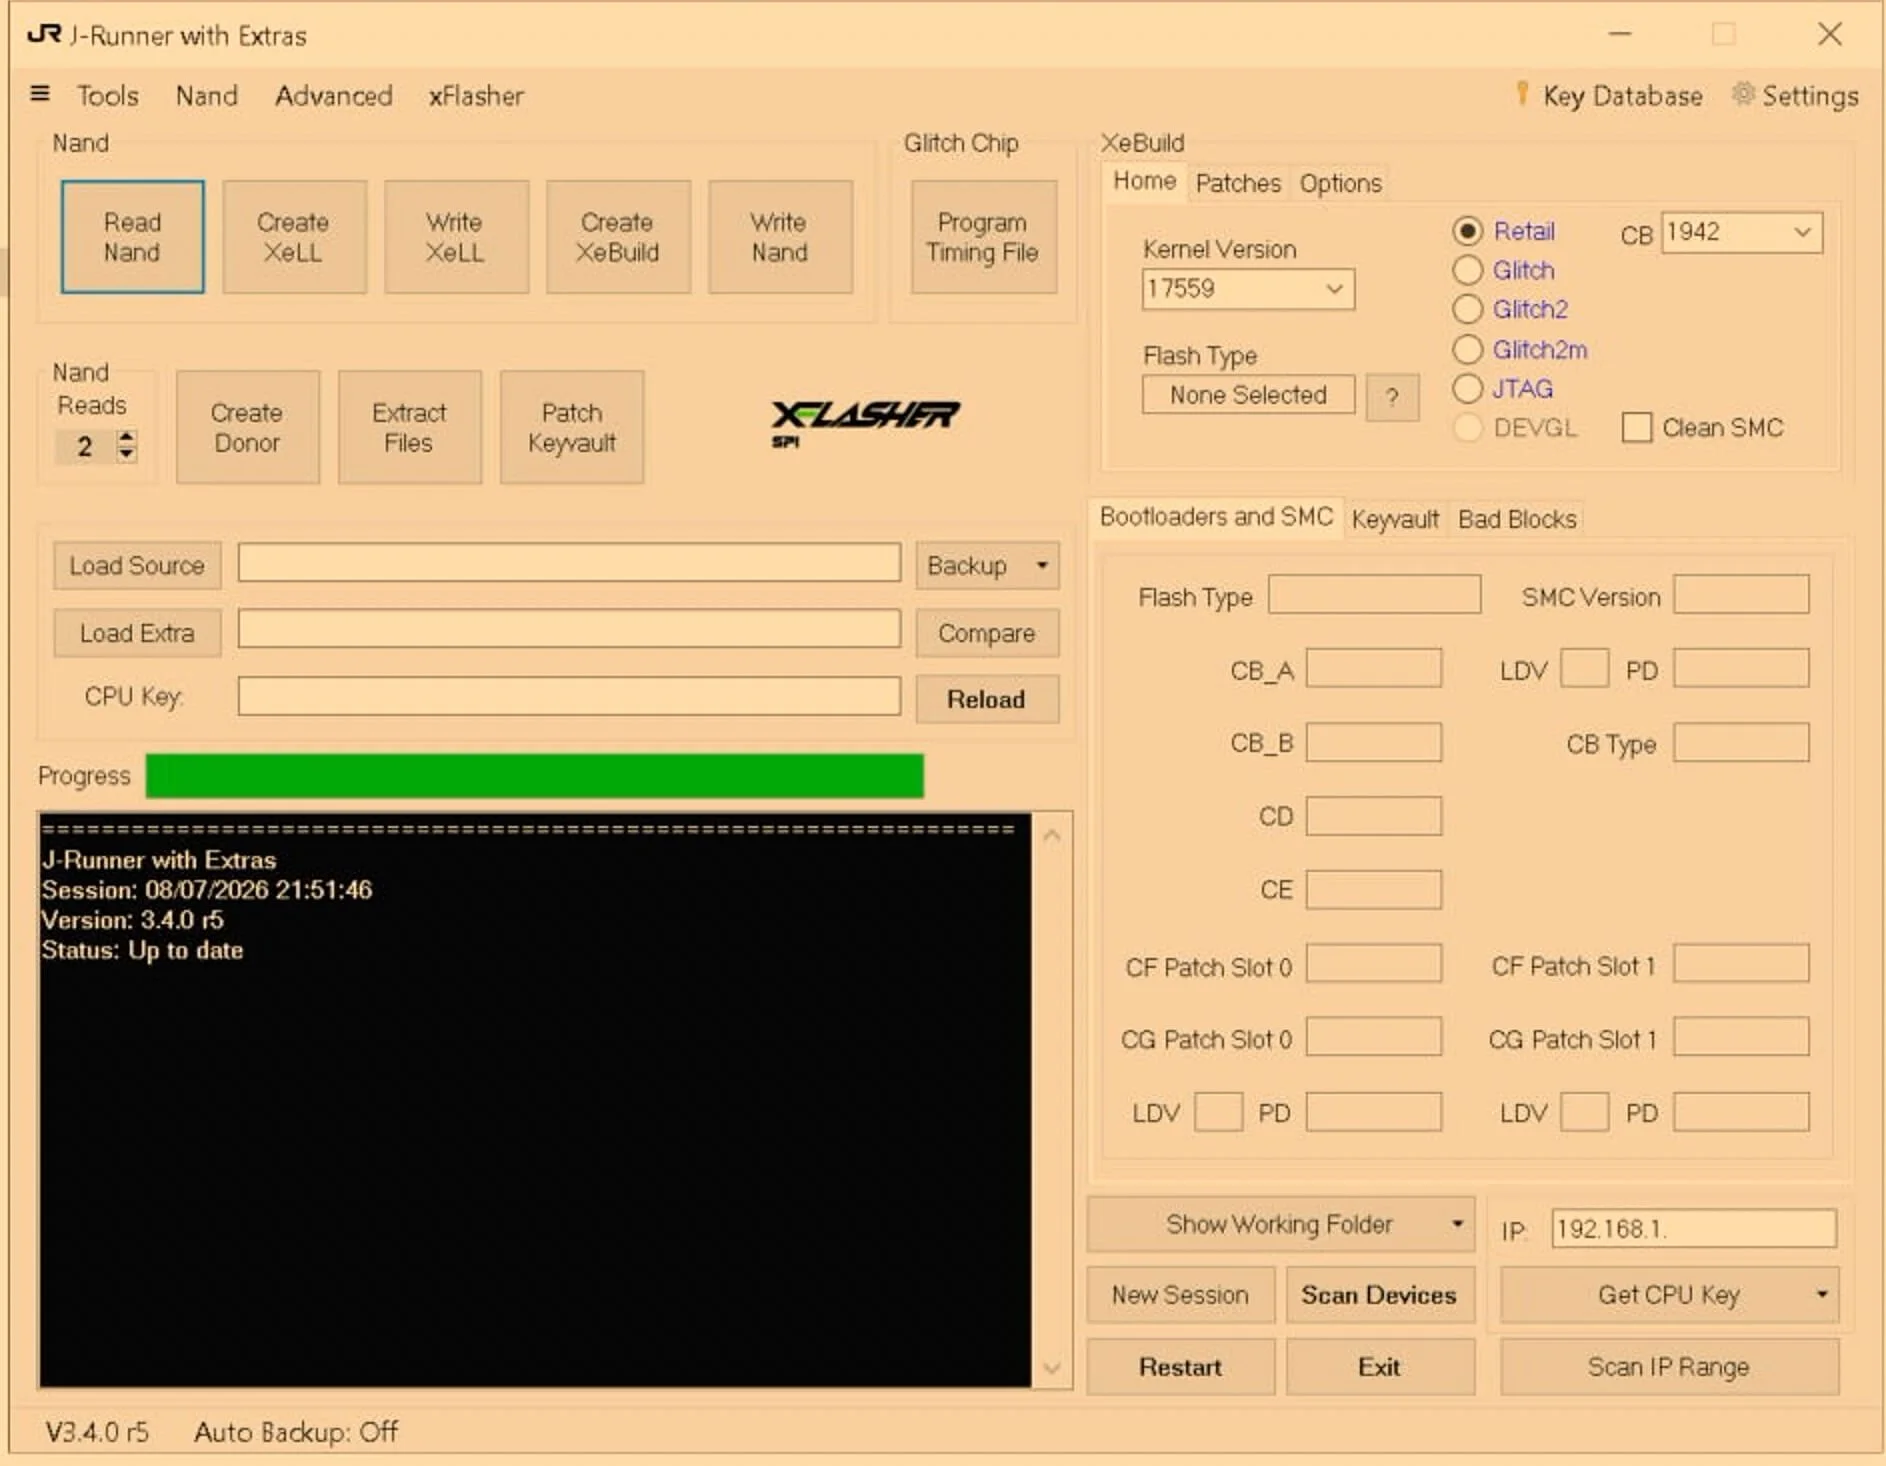
Nand Reads: 2
Retail, kernel 17559, CB 1942: Do not modify. J-Runner defaults to these variables before a read confirms the true system values.
Flash Type: None Selected
CPU Key: Blank
Click the Read Nand button once.
Understanding Your NAND Configuration
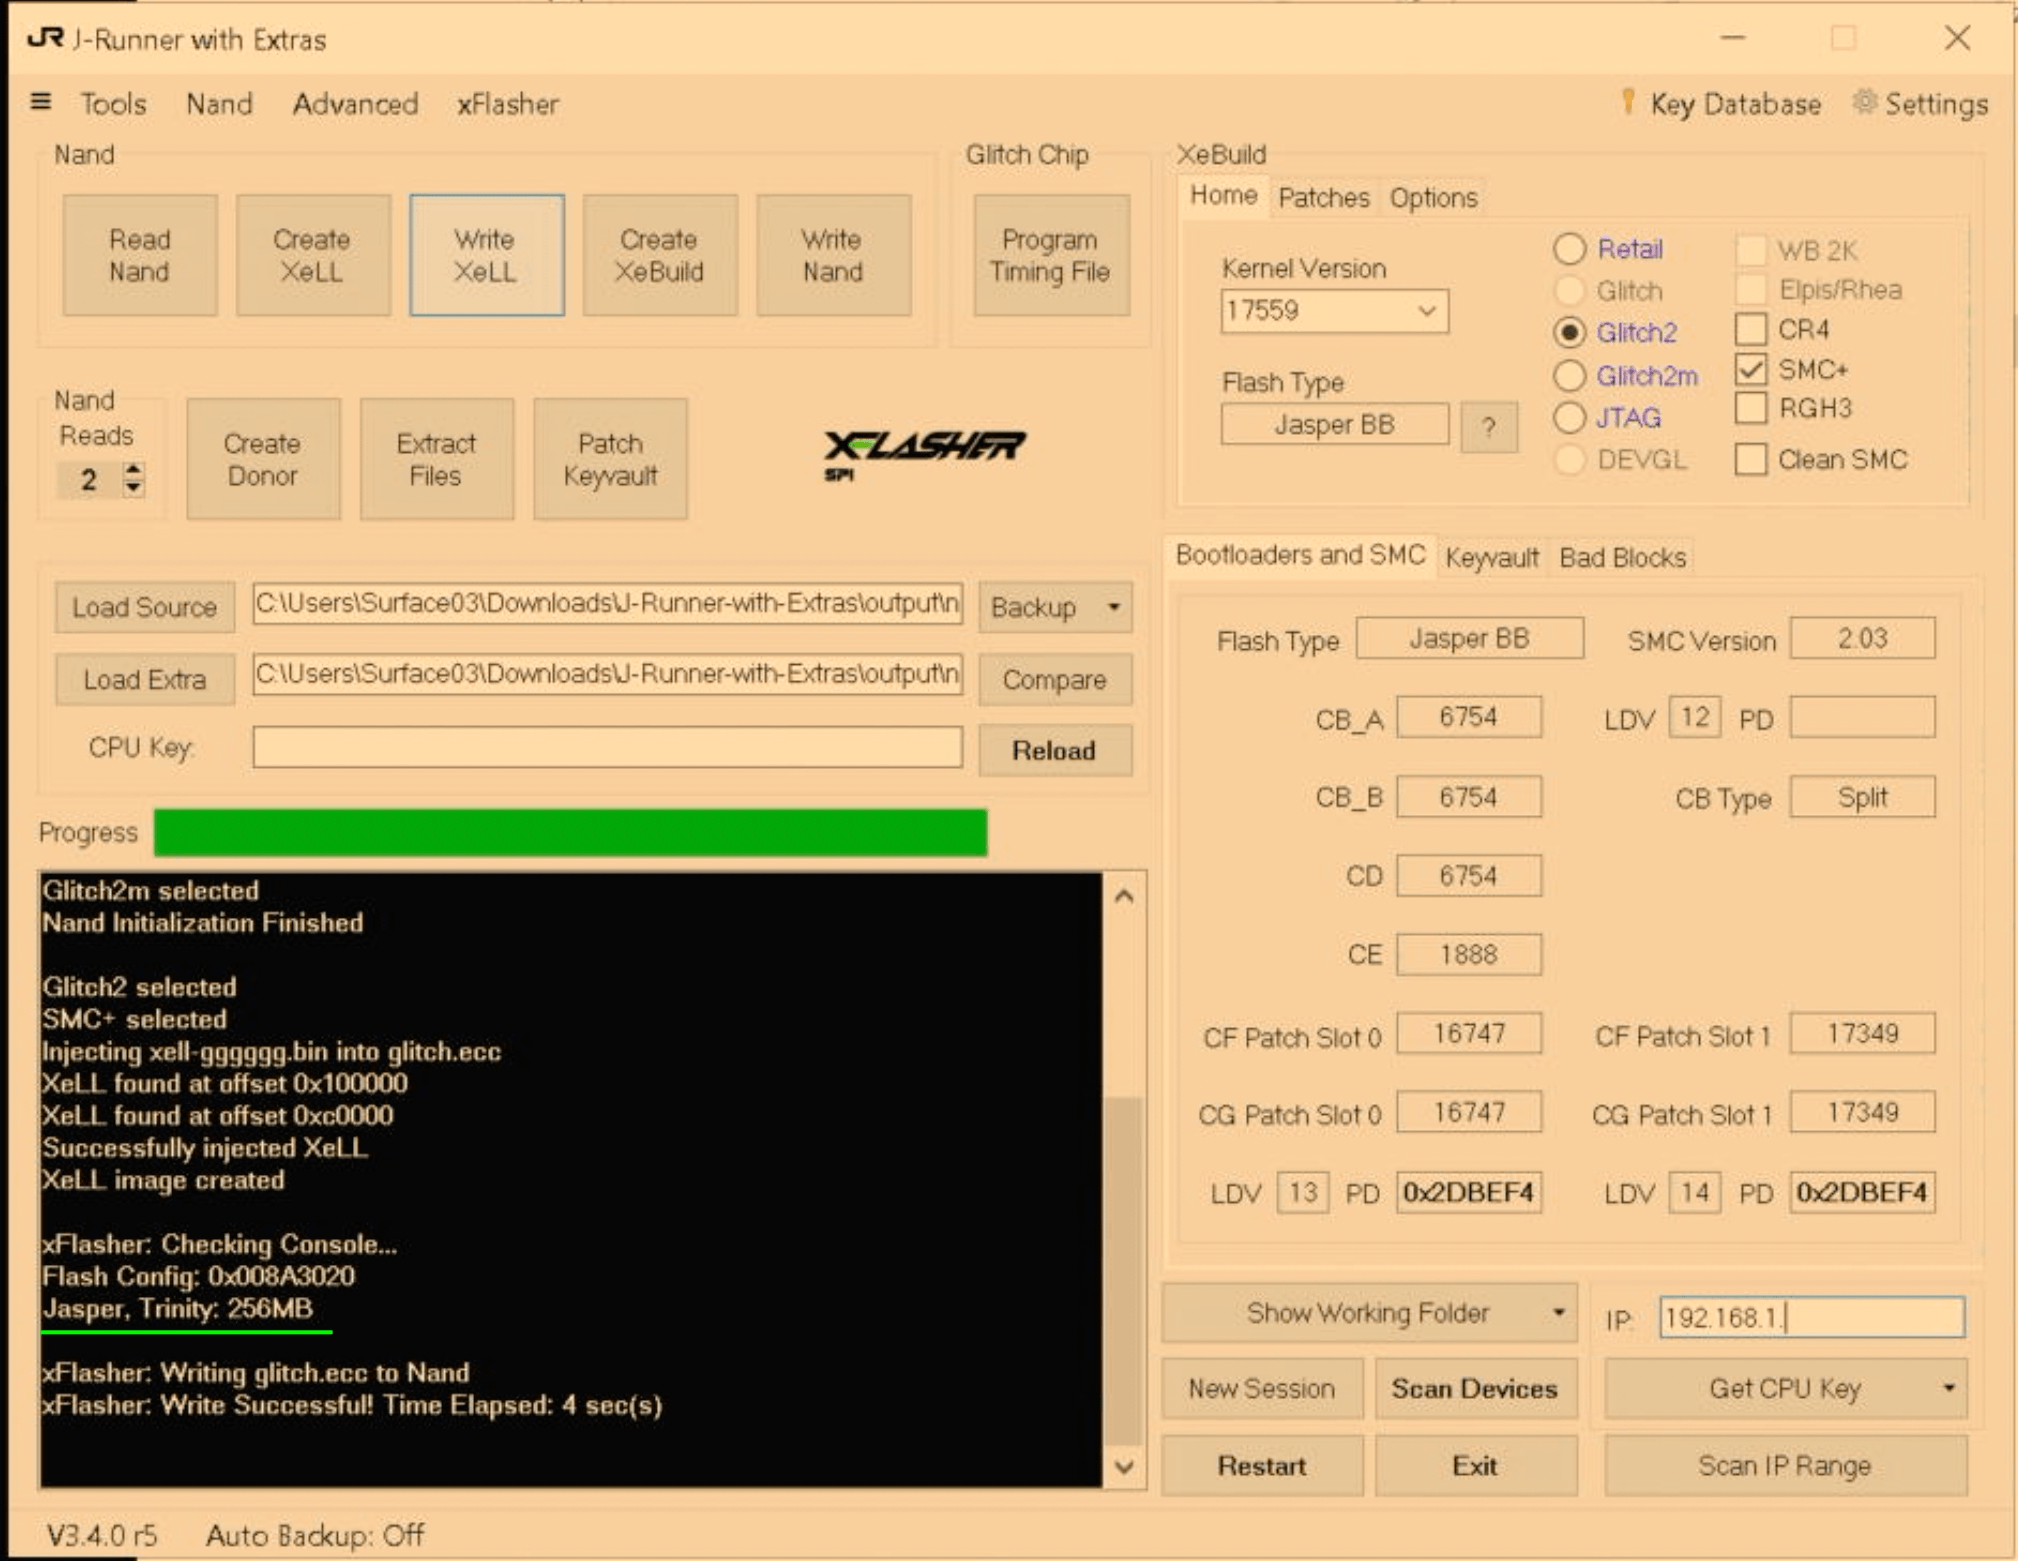
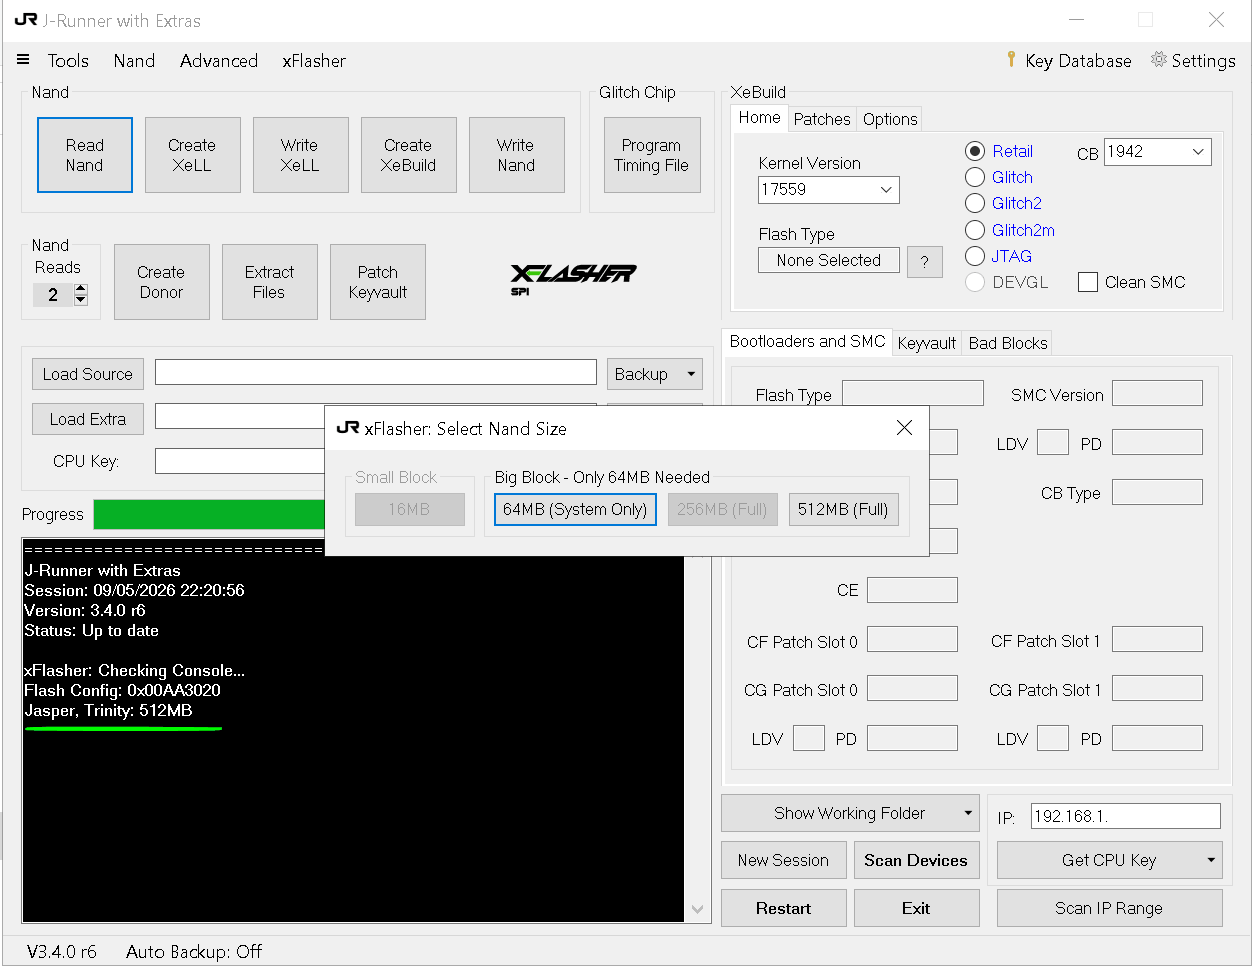
Jasper and Tonasket motherboards shipped with three distinct NAND storage capacities. J-Runner automatically queries the motherboard chip to determine its exact size.
Do not panic if your J-Runner output log differs from a tutorial screenshot. Your Flash Config hex code and read time will scale exactly to your console's physical storage capacity:
16MB (Standard): Flash Config: 0x00023010 (Read time: ~1 Minute)
256MB (Big Block): Flash Config: 0x008A3020 (Read time: ~3.5 Minutes)
512MB (Big Block): Flash Config: 0x00AA3020 (Read time: ~7.5 Minutes)
(Note: If J-Runner requests a size selection for a 256MB or 512MB board, always select the (Full) option. A full extraction preserves the internal memory-unit area alongside the system partition).
Verify the Extraction
Allow both extraction cycles to complete without disturbing the console, wiring, or USB connection.
Require this exact log output at the end of the process:
Comparing... Nands are the sameImmediately copy the J-Runner output directory containing nanddump1.bin and nanddump2.bin to at least two secure, offline storage locations.
Hard Stop Protocol
Stop immediately if J-Runner outputs 0x00000000, 0xFFFFFFFF, Console Not Found, or an unrecognized flash configuration. Do not attempt repeated writes or power-cycle the board. Verify solder continuity on the SPI harness before proceeding.
Step 3: Install the Matrix Glitch Chip
The Matrix chip sends precise timing pulses to the CPU to execute custom code.
Correct phat selector: upper row center-to-right bridged; upper-left isolated.
Leave open: all three pads in the lower selector row.
Correct oscillator disable: 0Ω link removed; adjacent 223 retained.
Permanent install group: bottom VCC, GND, A, B, and C.
No wire: bottom pads D and E remain empty for this Jasper/phat build.
Permanent install: bottom pad F is the phat PLL connection.
Programming only: right-side VCC/GND/TCK/TDO/TDI/TMS holes connect to the xFlasher JTAG cable temporarily, then disconnect. (you may need to solider your own pins)
Hardware Preparation: Remove the 0Ω link on the Matrix board to disable the onboard oscillator. Keep the 223 link intact. Leave pads D and E empty.
Permanent Wiring: Solder VCC, GND, A, B, C, and F from the Matrix chip to the designated motherboard points.
A = CPU_RST
B = POST
C = STBY_CLK
F = PLL
“VCC” Pad and “GND” (Ground) Pad are the only Matrix Chip wires that solder to the top of the motherboard, the rest route to and solder to the bottom of the motherboard
Matrix “Glitch” Chip install Note
Use VCC, GND, A, B, C, and F; leave D/E empty
With the onboard oscillator feed disabled, this Matrix uses the Jasper’s standby clock. The maintained phat map is fixed: A is reset, B is POST, C is standby clock, and F is phat PLL bypass. The warning about the “old point map” rejects its destinations—it does not reject pads A or C.
Topside of Jasper Motherboard Wiring Diagram
Wiring for RGH Mod using Matrix Glitcher Chip. Right Angles and Bends in wire routings done on purpose. (certain parts of motherboard cause interference and will not allow mod to work - this diagram is proven to work if done correctly)
Underside Xbox 360 Motherboard soldering points
Right Angles and Bends in wire routings done on purpose. (certain parts of motherboard cause interference and will not allow mod to work - this diagram is proven to work if done correctly)
Step 4: Program the Matrix Chip
The Matrix chip requires a timing file specific to the Jasper/Falcon architecture.
Disconnect the 7-wire SPI harness from the xFlasher.
Connect the 6-wire programming cable from the xFlasher to the Matrix header.
In J-Runner, navigate to Program Timing File -> RGH 1.2 V2 -> Falcon/Jasper.
Select timing file 21 (rgh12_fj_21_v2). Click program. Require the "Flash Successful" log entry.
Disconnect the 6-wire cable completely.
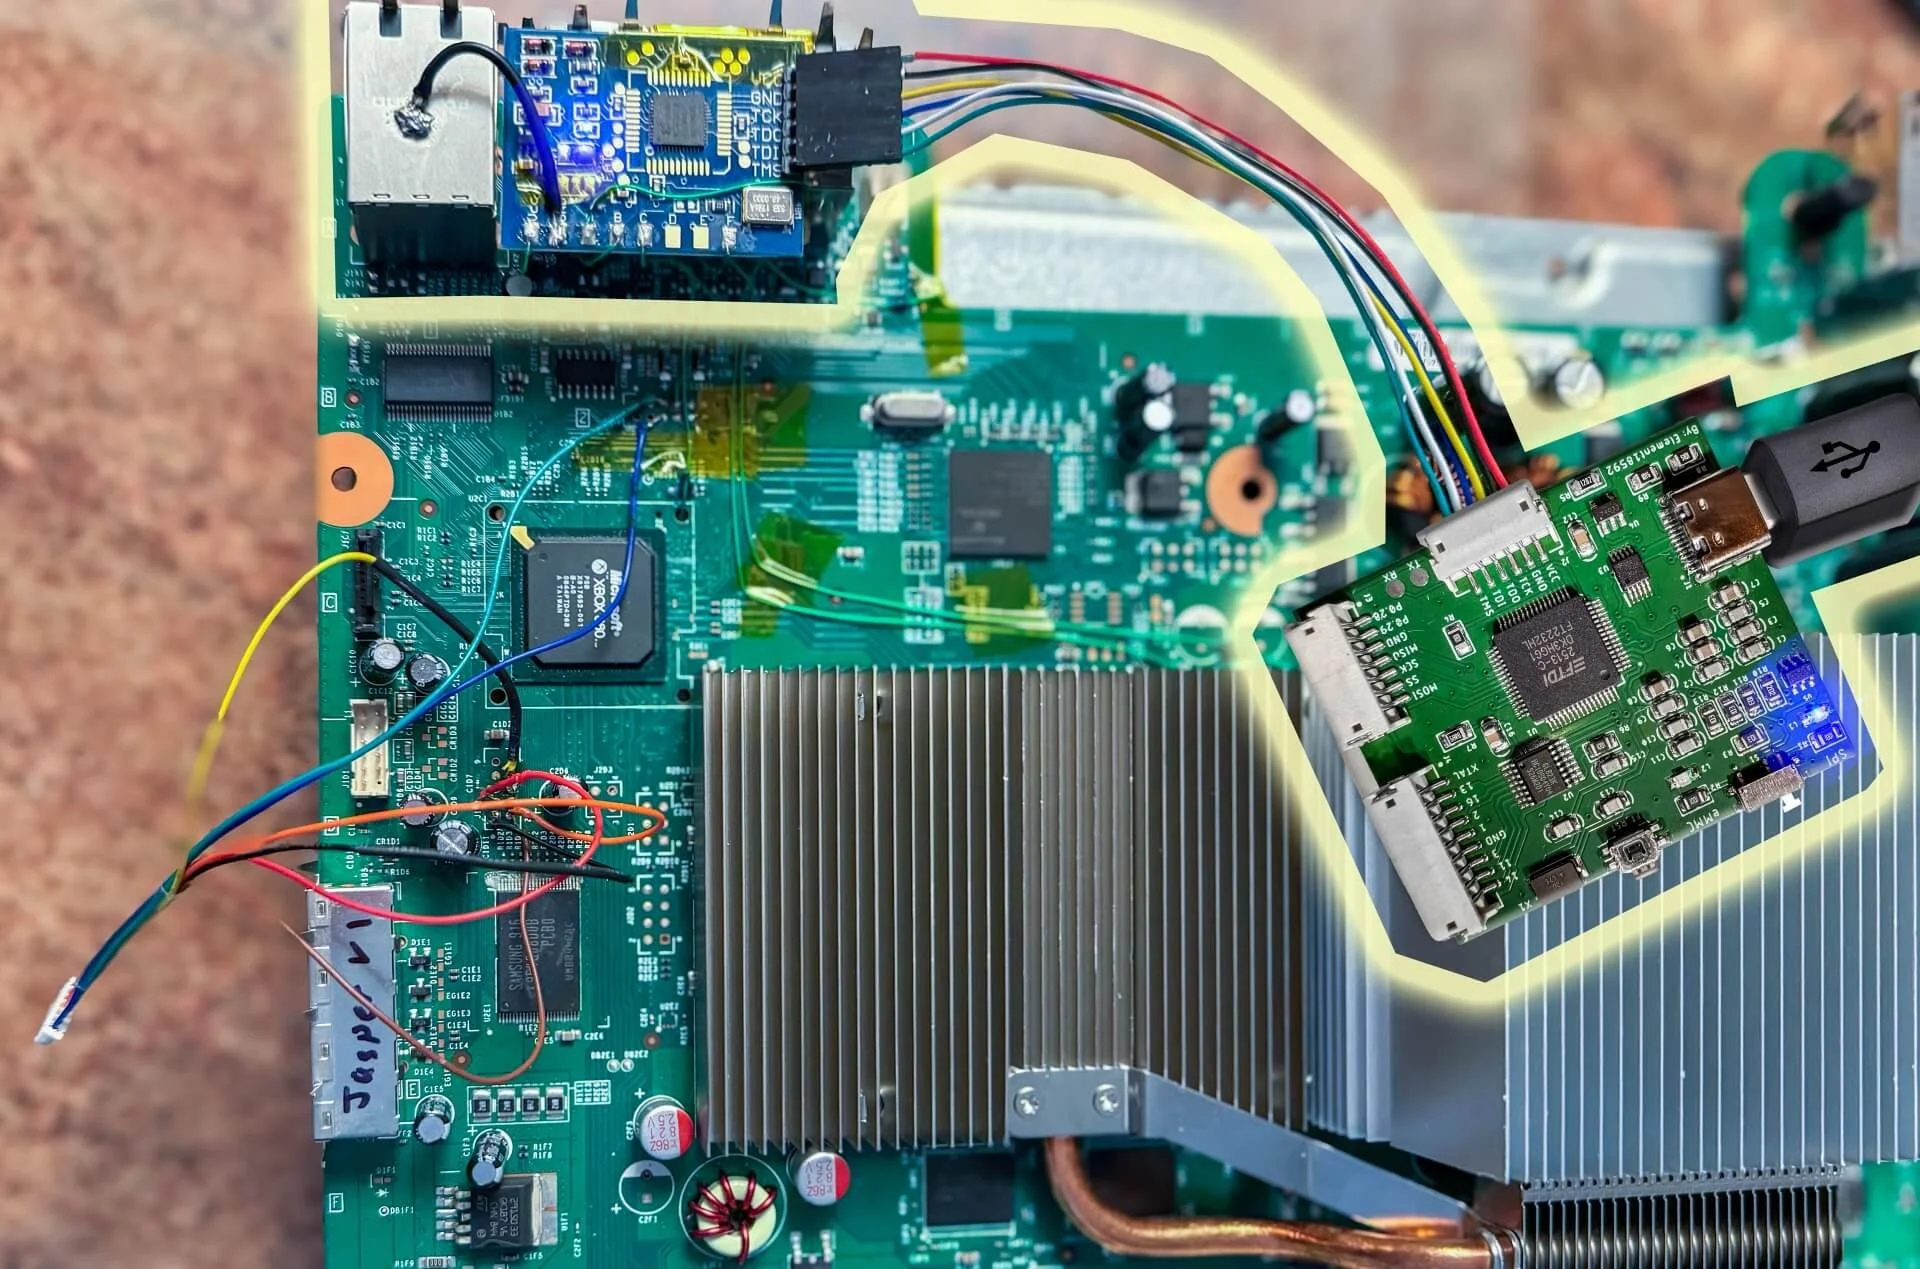
Highlighted: matrix chip to x-flasher 6 wire connection to usb
Step 5: Execute XeLL and Extract the CPU Key
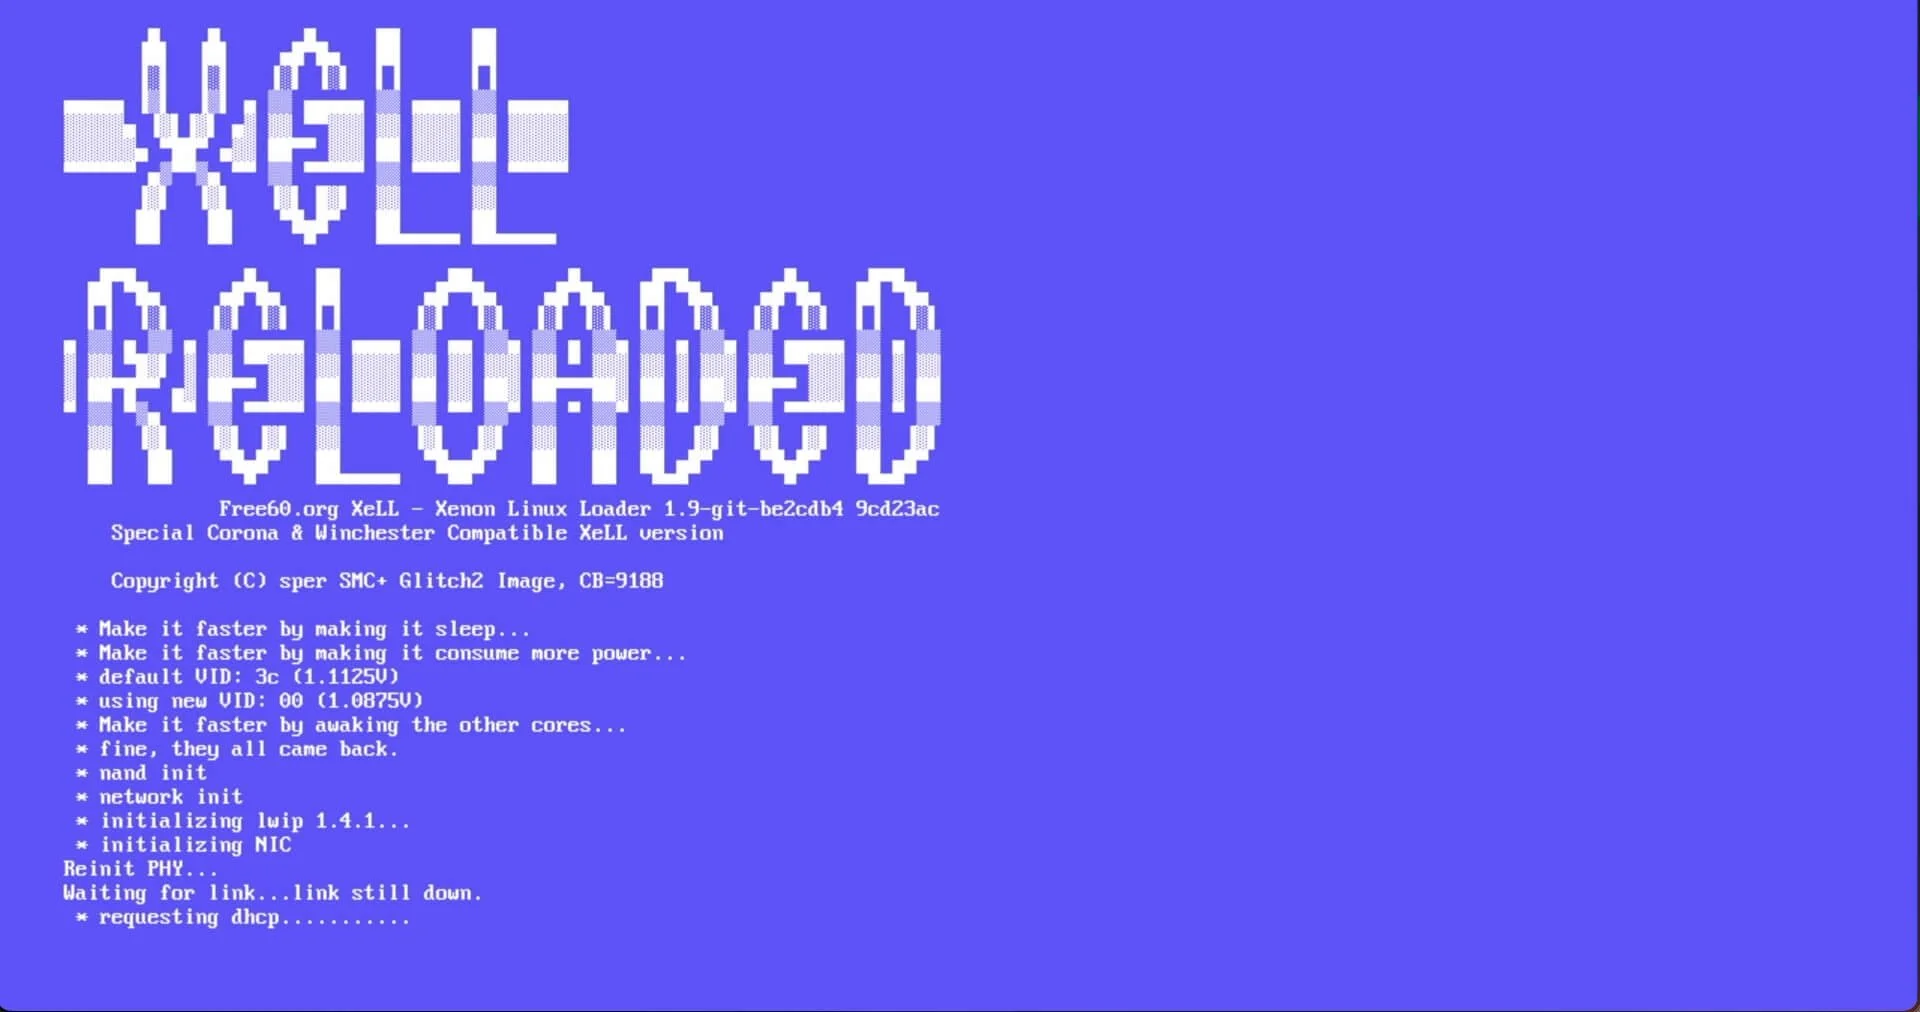
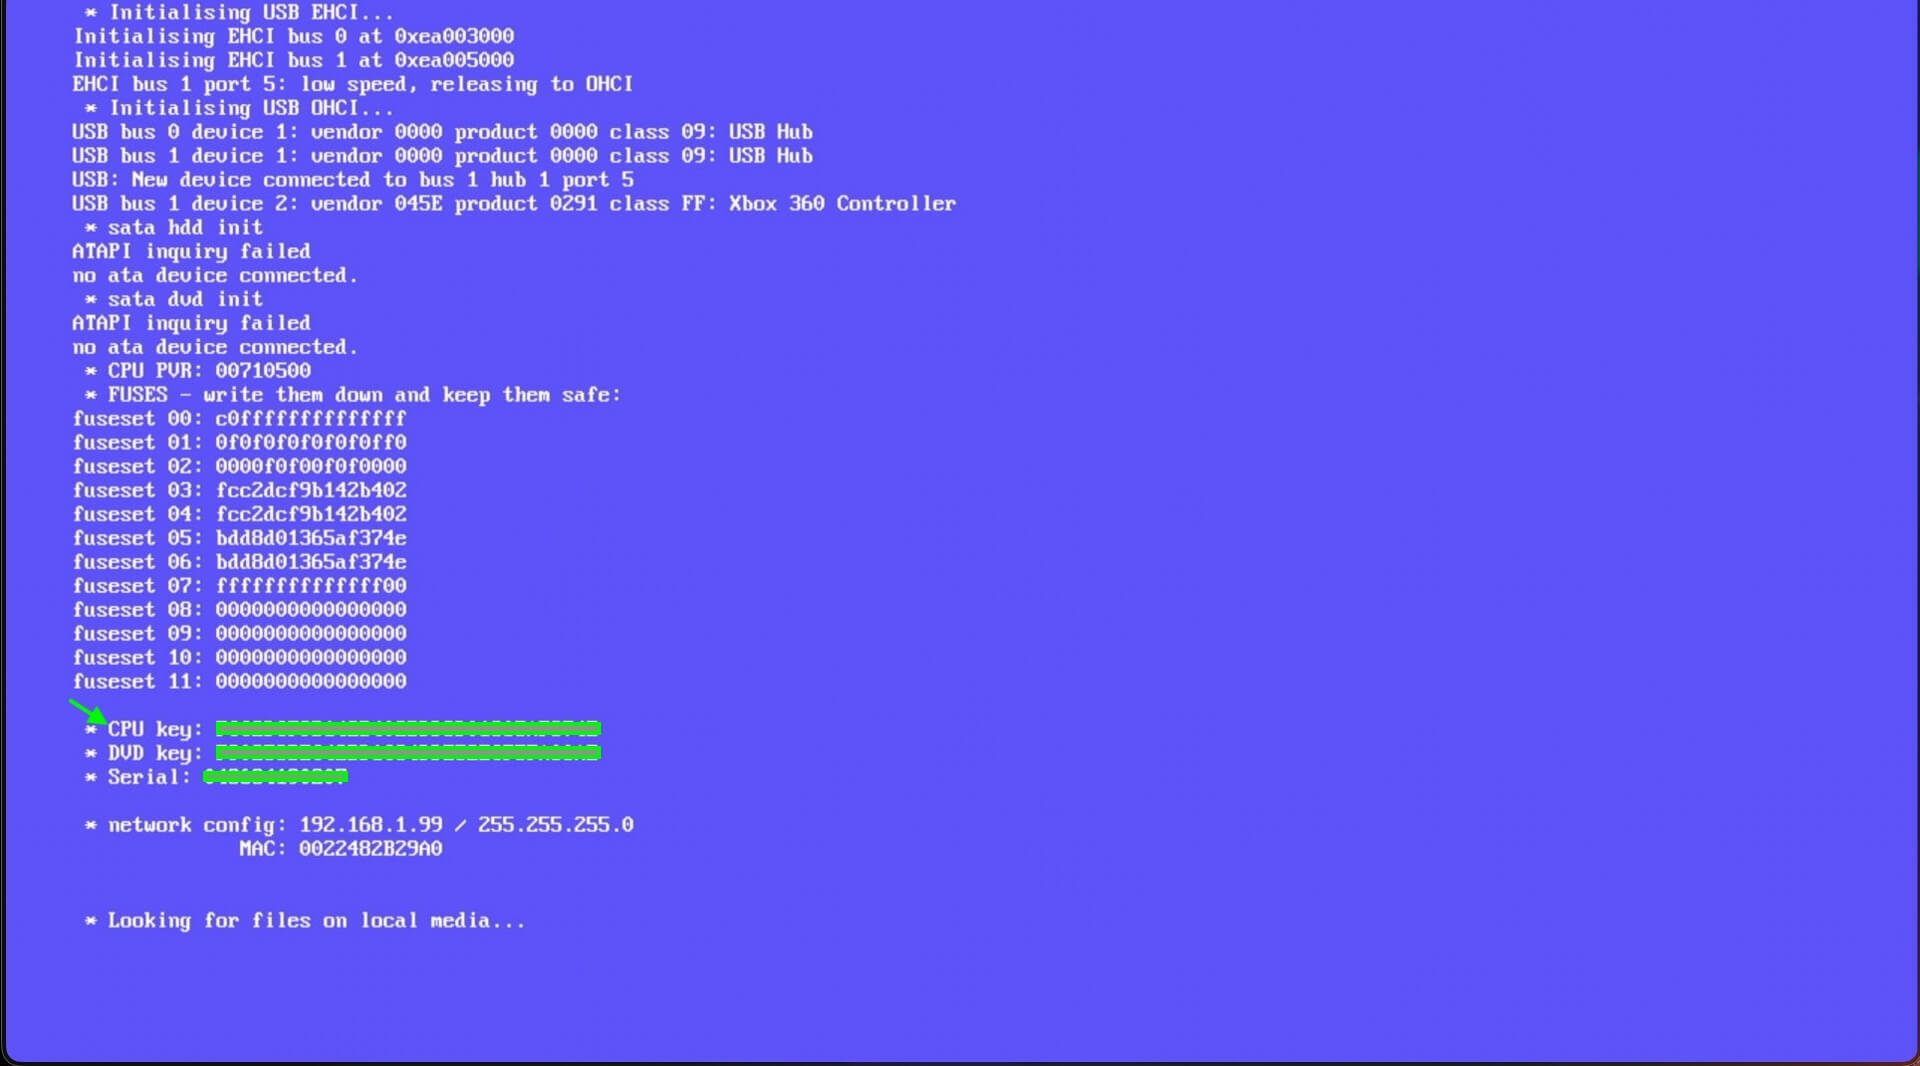
The console requires a custom operating system built specifically for its unique CPU key. You retrieve this key by booting a temporary Linux environment called XeLL.
Reconnect the 7-wire SPI harness to the xFlasher. Keep the console powered off with an amber power brick.
In J-Runner, load the original nanddump1.bin file.
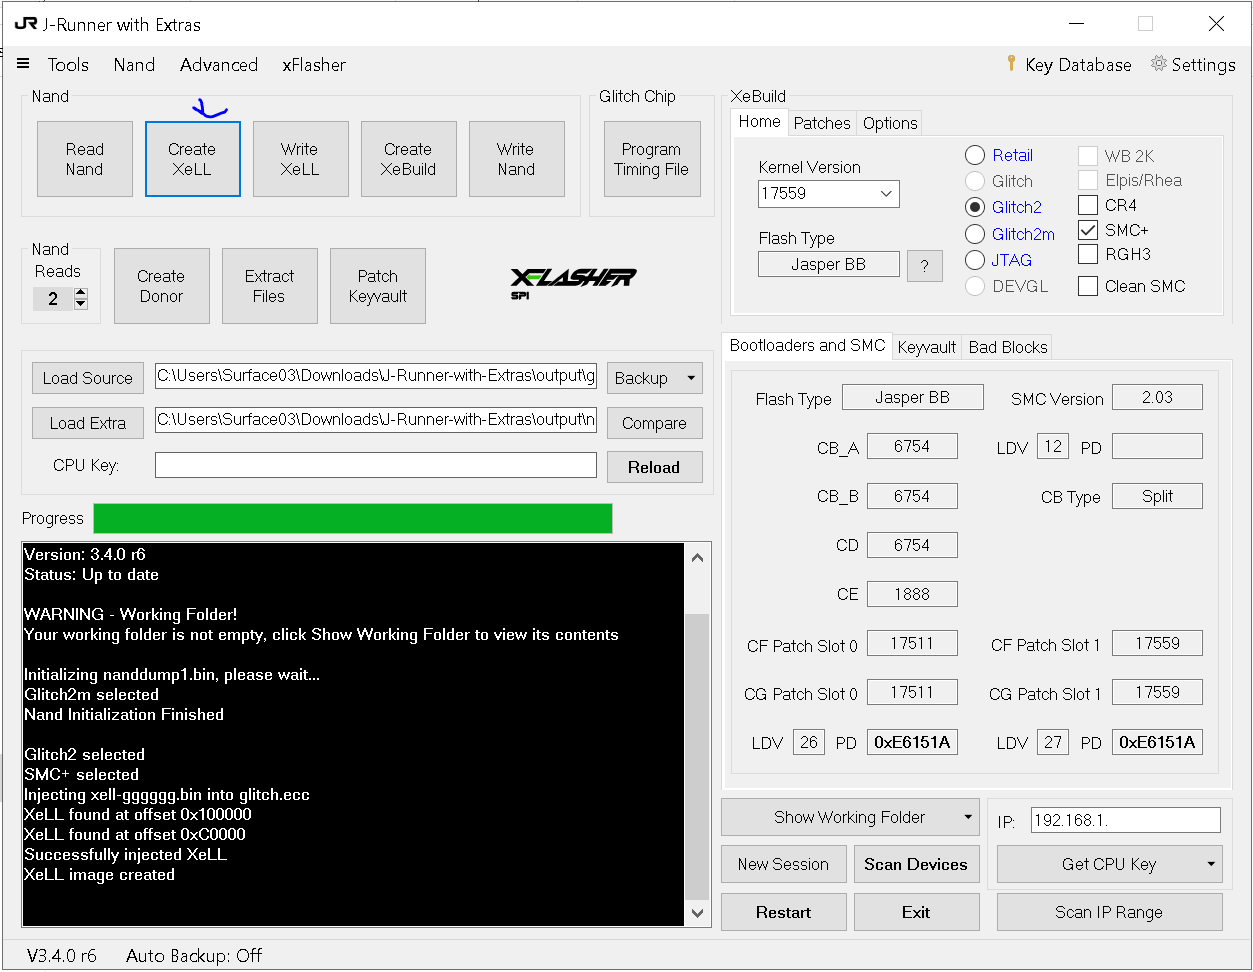
Select Glitch2 and enable SMC+. Do not select Glitch2m.
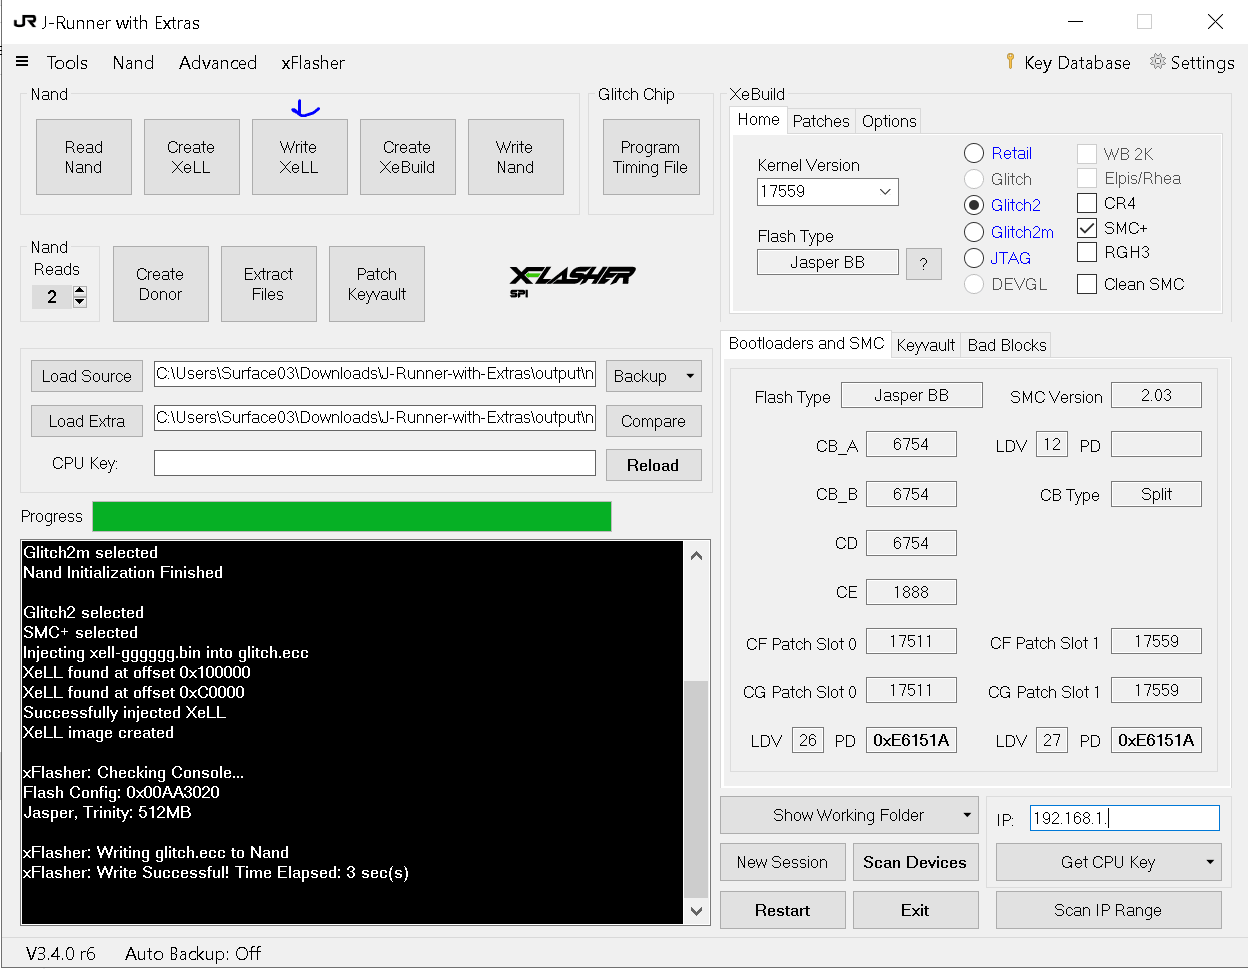
Click Create XeLL, followed by Write XeLL.
5. Disconnect the xFlasher from both the PC and the motherboard.
6. Connect the Xbox to a monitor. Connect the fans. Power the console on using the Eject button.
The XeLL blue screen will display within 60 seconds. Record the 32-character CPU Key.
Step 6: Write the Final XeBuild
1. Load the original nanddump1.bin file into J-Runner.
2. Select Glitch2 + SMC+.
3. Input the 32-character CPU key. J-Runner will decrypt the NAND structure.
4. Click Create XeBuild.
5. Ensure the console is off (amber power brick). Reconnect the SPI harness to the xFlasher.
6. Click Write NAND. Require the "Write Successful!" log entry.
Disconnect all programmer hardware. Reassemble the console chassis. Pressing the standard power button will now boot the unlocked Microsoft dashboard.
Step 7: System Directory Architecture (Aurora)
A standard dashboard provides minimal utility for an unlocked console. Install the Aurora dashboard and construct a strict directory structure to manage local files.
Connect the Xbox SSD to a computer and format the Hdd1: root directory using this exact architecture:
Hdd1:\Apps\
Store Aurora and DashLaunch here. Configure DashLaunch to bypass the Microsoft menu and boot Aurora automatically.
Hdd1:\Games\
Store ISO2GOD converted game folders here. Aurora will automatically scan these directories and download the associated cover artwork.
Hdd1:\Emulators\
Store standalone homebrew applications here.
Microsoft Content Directories Aurora manages base games, but official Xbox Live Arcade (XBLA) software and Downloadable Content (DLC) must reside in the proprietary Microsoft directory: Hdd1:\Content\0000000000000000\.
Base Title ID folders go directly inside the 16-zero directory.
DLC files require a subfolder named 00000002.
XBLA files require a subfolder named 000D0000.
The Retail Bridge Protocol (Legal DLC Transfer) Connecting a modified console to Xbox Live results in an immediate ban. Transfer previously purchased DLC securely using a stock console.
Authenticate your Xbox Live profile on a stock, unmodified Xbox 360.
Download owned assets to a FAT32 USB drive.
Connect the USB drive to a computer. Transfer the Content directory directly to the modified console's Hdd1: drive.
Keep the authenticated profile signed in on the modified console offline. This validates the Profile License, allowing unmodified DLC and XBLA games to execute locally.
**
Step 8: Thermal Management & Mac Software Integration
Hardware preservation requires active thermal management and reliable data transfer software.
• The Noctua Thermal Upgrade RGH modifications alter the console's baseline thermal profile. Rule Mobile engineered a 3D-printable mounting bracket that attaches a 40x10mm Noctua fan directly to the internal mini radiator.
• Performance Data: Reduces dashboard temperatures by 8°C to 11°C.
• Manufacturing: Download the free STL file on Cults3D. You must print this component in ABS or ASA filament. Standard PLA will melt under operating temperatures.
Software Tooling: Orbit 360 Managing FATX file systems on macOS requires specialized software. Rule Mobile is developing Orbit 360, a native macOS application built to manage Xbox 360 SSD data, inspect XEX headers, edit save files, and execute ISO2GOD conversions locally. Monitor Rule Mobile announcements for the release schedule.
